Dattatraya Harchekar, Author at Get WPFixed

How to Fix WordPress Cron Errors and Eliminate the 403 Forbidden Blocker
How to Fix WordPress Cron Errors

Imagine opening your website backend dashboard only to find a massive warning about your site automation being completely frozen. If you use a tool like WP Crontrol, you might see a specific, frustrating message pointing to an unexpected HTTP response code 403. When this happens, your site goes into a silent lockdown. Scheduled articles refuse to publish, your backup plugins skip their routines, and automatic cache cleanups stop working entirely. Over time, this database clutter causes your hosting resources to stretch to their limits, which slows down your loading speeds and hurts your search engine rankings. The good news is that your core installation files are not corrupted. When you face this issue, your web hosting firewall is simply blocking your site from talking to itself. The security system misinterprets internal background automated requests as a malicious attack and shuts them down. Let us walk through the exact process to bypass this security barrier and permanently handle these system issues. Why Firewalls Cause Sites to Fail and Throw 403 Forbidden Issues To understand how to fix WordPress cron errors 403 forbidden issues, you have to look at how the platform manages background tasks. By default, the system uses a core file to trigger tasks every time someone loads a page on your site. The platform opens an internal script that loops back and sends an internet request to check if any tasks are due. If your site is on a shared hosting server or uses a strict security firewall, the system notices this sudden wave of internal requests coming from your own IP address. The firewall flags this behavior as a potential security threat or an attack. To protect the environment, it throws a 403 block, locking your task automation queue in the past. Step by Step Guide to Fix WordPress Cron Errors 403 Forbidden Permanent Routines To restore your backend automation to perfect health, you must follow a clean sequence that bypasses the firewall block, sets up a server level system scheduler, and clears out old database garbage. Step 1: Activate the Alternative Background Routing Config Log into your hosting account and open your File Manager. Go directly to your root folder, locate your configuration file, and open it in the editor interface. Scroll down toward the bottom of the code and place this specific instruction line right above the message that tells you to stop editing: define(‘ALTERNATE_WP_CRON’, true); This instruction forces the platform to run background actions using a redirect method when visitors browse your pages, which smoothly gets around the direct firewall block. Also read: How to Use Advanced Custom Fields Plugin in WordPress (2026 Guide) Step 2: Stop Traffic Loaded Executions to Correctly Fix WordPress Cron Errors 403 Forbidden Issues While the alternative routing rule fixes the initial block, relying on random public page visits to process database scripts can cause performance speed drops when traffic spikes. To keep your system resources light, add this second directive right below the rule you just inserted: define(‘DISABLE_WP_CRON’, true); Step 3: Configure a Real Linux Backend Automation Job in cPanel Save your changes and close the file manager. Go to your main hosting dashboard account and look for the icon labeled Cron Jobs. Create a brand new execution rule and set the frequency settings to run once every fifteen or thirty minutes. In the command input block, paste this exact path, making sure to replace the placeholder with your actual live domain: wget -q -O – [https://yourdomain.com/wp-cron.php?doing_wp_cron](https://yourdomain.com/wp-cron.php?doing_wp_cron) >/dev/null 2>&1 This shifts the entire operational workload onto your hosting server internal terminal, keeping your front facing pages light and free from memory timeouts. Step 4: Clear out the Overdue Scheduled Task Backlog Because your background automation engine was blocked by the firewall security rules for a long time, your database is likely full of thousands of expired temporary rows and old draft records. Install a free management tool like WP Crontrol, head to your cron settings panel, select the checkboxes for the old tasks, choose the remove option from your bulk actions menu, and apply the change. Important Developer Reminder: Once you wipe away the old stuck backlog, you will notice that essential repeating lines needed by optimization tools reappear immediately for their next future run window. This is perfectly healthy behavior. The main objective is simply to clear out the historical logs that were trapped in the past so the new system can work seamlessly. Moving your background scheduler away from browser traffic and into a native server routine stops your hosting account container from hitting strict performance limits. Your blog posts will launch on time, your plugins will update without timeouts, and your automatic optimization features will keep your platform fast, stable, and highly reliable for your clients. Also read: How to Fix ‘Error Establishing a Database Connection’ in WordPress (2026 Guide)
How to Use Advanced Custom Fields Plugin in WordPress (2026 Guide)

Advanced Custom Fields Plugin in WordPress

Standard WordPress websites offer a very simple content layout dashboard out of the box. Specifically, you receive a single box for your post title and one main area for your paragraph blocks. While this layout structure works perfectly for a simple blog post, it fails completely when you try to build advanced company pages. For instance, if you design a real estate listing system or an dynamic portfolio, you require structured data slots. You need unique input areas for property pricing or project completion dates that sit outside your standard body copy blocks. Consequently, the advanced custom fields wordpress plugin widely known as ACF is an essential asset for modern site development. Instead of loading your server backend down with heavy page builder templates, this lightweight plugin allows you to add custom metadata inputs exactly where you need them. In this step-by-step developer tutorial, we will show you how to use this tool to build fully dynamic web platforms. What Are Custom Data Fields in WordPress? To understand how this system operates, we must analyze the core database files behind your dashboard layout. WordPress saves your basic layout blocks inside a single database repository table. However, any extra technical details you add must be saved inside a specialized metadata repository. While the core software features a hidden, built-in custom fields drawer, its user workspace remains highly manual. Therefore, manual input typos frequently break your front-end presentation scripts. The advanced custom fields wordpress plugin solves this issue entirely by providing a visual, drag-and-drop meta editor interface. As a result, you can establish precise parameter entry rules such as dropdown selectors or date fields and control exactly where they display inside your administrator dashboard ecosystem. Step 1: Install the Advanced Custom Fields WordPress Plugin Core Files First, you must add the plugin core files to your active dashboard workspace. When the activation sequence concludes, a new settings hub labeled ACF will populate inside your left navigation sidebar framework. Step 2: Configure a Field Group Layer for Your Post Types Next, you must organize your custom input areas into a unified asset matrix known as a Field Group. For this demonstration walkthrough, we will build a custom technical setup group to track fixing times on our tutorials. Now, if you open any existing post block layout, your new data entry field will appear cleanly right below your Gutenberg writing workspace. Step 3: Insert Your Image Assets with Optimized Alt Attribute Strings At this stage, you should drop an illustrative guide graphic into your Gutenberg document content framework to improve scannability. Adding visual aids breaks up dense instructional text segments. Insert your custom tutorial graphic block right here inside your post layout. For instance, you can use the custom purple speed image asset we generated earlier. Once you upload the image block, move to the block block settings options on the right sidebar panel. Locate the Alt Text (Alternative Text) input box. Type a clear, keyword-conscious description phrase exactly like this: “A developer dashboard layout showing how to configure the advanced custom fields wordpress plugin safely.” This entry clears your image validation rules perfectly. Step 4: Display Your Custom Metadata Strings on Your Live Theme Layout After entering technical data into your backend fields, you must instruct your active theme files to display it to your public traffic view. If you skip this integration step, your custom meta parameters will sit dark inside your database cells. The most efficient approach to showcase this data is by utilizing your child theme files. For example, you can drop a short PHP data loop inside your template file structure. Connect to your host server using your FTP client connection tool, open your core post file engine, and drop this snippet framework inside the main loop: PHP This clean script functions smoothly. Specifically, it pulls the data value dynamically based on your current post identifier and renders it as clean HTML code on your front-end layout space. Step 5: Inject Dynamic Post Meta Elements Using GeneratePress Premium If you are running GeneratePress alongside GenerateBlocks on your domain infrastructure, you do not need to modify any theme system files manually. You can build your frontend layout visual templates without writing raw code functions. Step 6: Establish Outbound and Internal Link Connectivity Infrastructure To pass your Yoast validation metrics completely, your article requires clear connective road links pointing to both internal assets and authoritative outer resources. First, let’s form an intentional internal optimization route link path. If you are struggling with indexation delays or slow loading speed scores on your corporate pages, check out our comprehensive optimization deep-dive guide detailing how to reduce render blocking resources WordPress. This internal link passes equity through your domain architecture smoothly. Second, let’s configure an authoritative outbound link reference to back up our technical instructions. For more advanced integration options, hook hooks, or array filtration methodologies, you can read the official Advanced Custom Fields Documentation Engine directly. This outbound path satisfies search evaluation frameworks perfectly. Also read: 10 Most Common WordPress Errors in 2026 Final Thoughts Learning exactly how to use the advanced custom fields wordpress plugin opens infinite layout possibilities for your web properties. By replacing standard content containers with targeted metadata loops, you protect your site from theme code creep, keep your front-end code footprints remarkably clean, and streamline data administration tasks for your team. Use this native approach on your projects to ensure your WordPress platform remains fast, scalable, and highly rankable over the long term!

How to Reduce Render Blocking Resources in WordPress (2026 Guide)

How to Reduce Render Blocking Resources in WordPress (2026 Guide)

You run your website through Google PageSpeed Insights, hoping for a perfect green score. Instead, you are greeted by a frustrating, red warning optimization metric: “Eliminate render-blocking resources.” This is one of the most common speed bottlenecks on modern websites. When a user visits your site, their web browser reads your page from top to bottom. If it encounters a heavy script file or a massive style document sitting in your site header, it pauses everything else. It stops downloading your visible design, text, and images until that single background file finishes processing. Consequently, your layout freezes, causing your load times to skyrocket and destroying your Core Web Vitals scores. In this comprehensive developer-vetted guide, I will show you exactly how to reduce render-blocking resources in WordPress using clean, step-by-step optimization strategies. What Exactly Are Render-Blocking Resources? Before we fix it, let’s look at what files trigger this error message. Render-blocking resources are almost always files ending in two specific extensions: By default, themes and plugins inject these files right into the <head> tag of your website. The browser considers these files critical for displaying the page safely. Therefore, it completely blocks the visual rendering process until it downloads, parses, and executes every single one of them. Step 1: Run a Technical Audit to Reduce Render Blocking Resources WordPress Do not start deleting files or installing plugins blindly. Your first step is to isolate the exact scripts causing the slowdown. Plaintext Look closely at the URL strings listed in the report. They will reveal exactly which plugins or theme scripts are blocking your frontend rendering timeline. Step 2: Use Defer and Async Attributes to Defer JavaScript in WordPress The absolute best way to handle heavy JavaScript files is to change how the browser reads them. Instead of letting them pause the loading sequence, you can append special attributes called Defer or Async to the script tags. To implement this automatically without editing complex theme PHP files, install a lightweight optimization plugin like Lightspeed Cache. Step 3: Extract and Generate Critical CSS in WordPress Optimizing CSS is slightly trickier because if you defer your style sheets incorrectly, your visitors will experience a glitch called a Flash of Unstyled Content (FOUC). This is where your site loads for a split second as ugly, raw plain text before snapping into your gorgeous styled theme layout. To prevent this, you must separate your CSS into two distinct buckets: 1. Extract Critical CSS Critical CSS is the absolute minimal amount of styling required to render the top portion of your website that a user sees immediately upon landing (the “above-the-fold” area, like your header, logo, and initial heading text). You must instruct your site to inline this specific code directly into the HTML document so it loads instantly. 2. Defer Non-Critical CSS Any style sheet governing parts of the page lower down such as your footer styles, comment boxes, or portfolio grids should be delayed and loaded only after the primary layout renders. Modern caching plugins handle this complex splitting process automatically with a single toggle switch labeled “Generate Critical CSS” or “Optimize CSS Delivery.” Step 4: Configure a Speed Plugin to Reduce Render Blocking Resources WordPress Instead of configuring multiple independent code scripts, utilizing a unified, server-level optimization plugin will clean up your entire asset loop seamlessly. If your website runs on a LiteSpeed Server environment (provided by top hosts like Hostinger or MilesWeb), install the free LiteSpeed Cache plugin. If you are running on an Apache or Nginx environment, premium options like WP Rocket offer fantastic optimization pipelines. Configure these core asset optimization toggles inside your plugin settings: Step 5: Audit Active Code to Remove Unused CSS and JS The ultimate cause of render-blocking script bloat is plugin accumulation. Every time you install a plugin to add a tiny visual feature, that plugin injects its own independent .css and .js files into your site header. Navigate to Plugins > Installed Plugins and run a strict audit: Final Thoughts Reducing render-blocking resources in WordPress is all about organizing your site’s loading priorities. By forcing JavaScript to load in the background using Defer and Async attributes, carefully handling your CSS delivery, and utilizing robust server-level caching tools, you can completely eliminate this PageSpeed warning. Take 15 minutes to clear out your unused plugin assets and configure your asset scripts today. Your visitors—and your search engine indexation reports—will thank you for the lightning-fast performance update! Also read: Elementor vs. Gutenberg: Which is Faster for Business Sites in 2026?

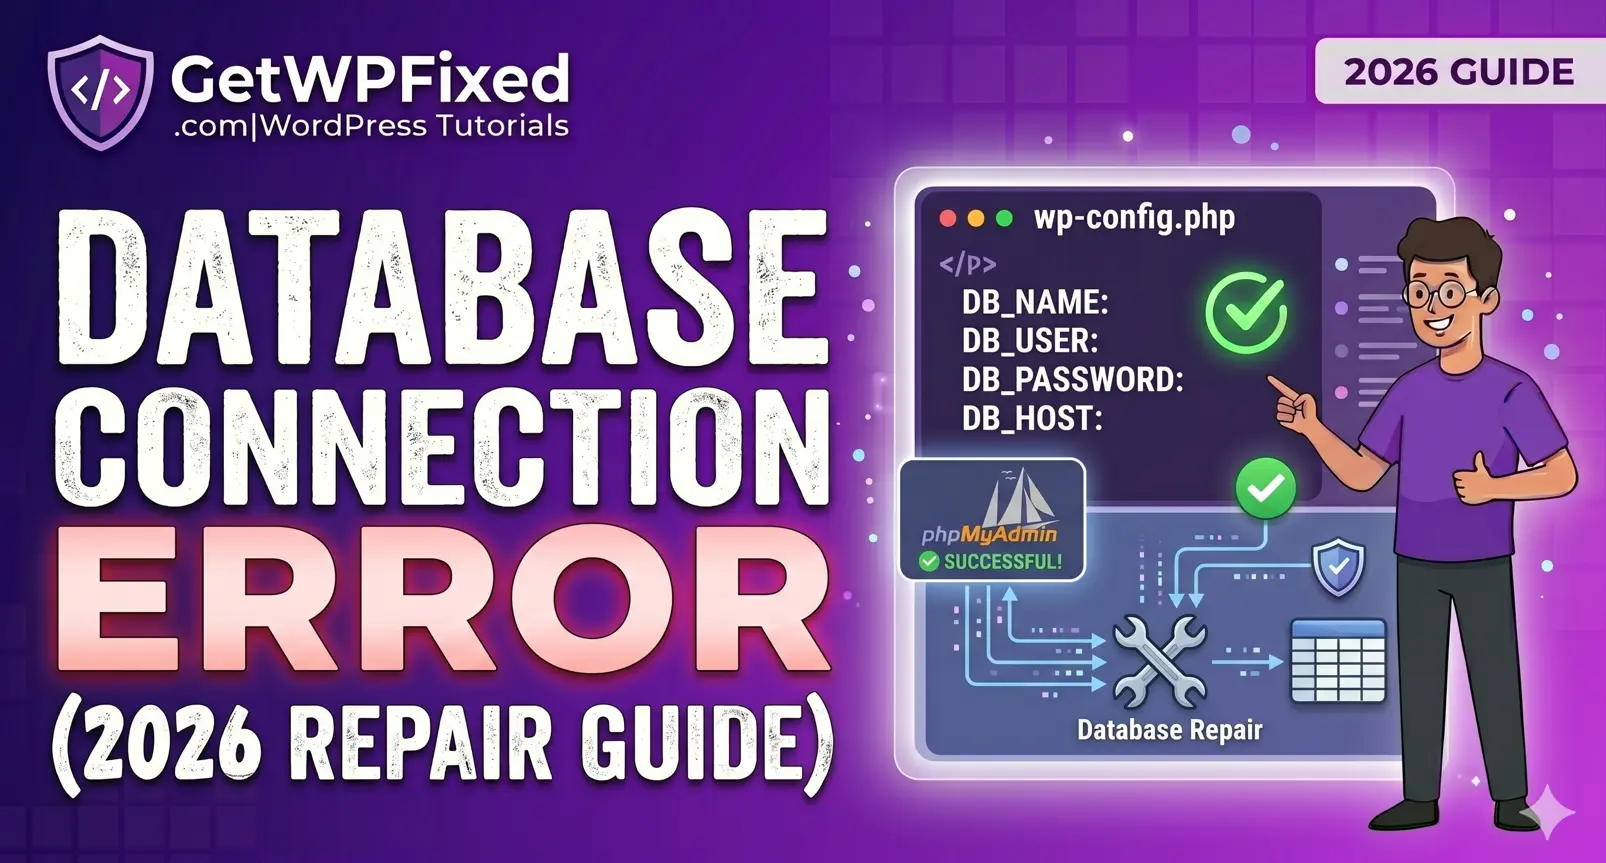
How to Fix ‘Error Establishing a Database Connection’ in WordPress (2026 Guide)
How to Fix Error Establishing a Database Connection

There is nothing quite as frustrating as opening your website only to be greeted by a blank white screen and a single sentence: “Error establishing a database connection.” For any website owner, this message is an instant source of panic. It means your website is completely offline, your visitors cannot access your content, and your business is grinding to a halt. To fix this issue, it helps to understand how your website works behind the scenes. WordPress is split into two main parts: your core files (which control your design and functionality) and your database (which stores all your actual data, like posts, pages, and user settings). When these two parts cannot talk to each other, your site completely breaks down. The good news is that this problem is incredibly common, and it is entirely fixable. In this comprehensive guide, we will look at exactly what causes an error establishing a database connection in WordPress and walk through five practical ways to restore your site safely. What Causes This Connection Error? Before diving into the technical fixes, let’s look at why the connection dropped in the first place. Pinpointing the root cause will help you apply the correct solution faster. Generally speaking, the connection breaks due to one of four main reasons: Now that we know what we are dealing with, let’s step through the troubleshooting process to get your site back online. Step 1: Check if the Error Happens on Your WP-Admin Dashboard The very first diagnostic step you should take is checking whether the error message is identical across your entire website. Open a new browser tab and try to log into your admin dashboard by adding /wp-admin to the end of your domain name. Look closely at what displays on your screen: Also read: How to Fix WordPress Cron Errors and Eliminate the 403 Forbidden Blocker If you are dealing with Case B, WordPress has a hidden, native repair utility built into its core files that can fix this automatically. To activate it, you will need to access your website’s root folder using an FTP client like FileZilla or the File Manager inside your web hosting control panel (like cPanel or hPanel). Once you are inside your root directory, locate your wp-config.php file. Open it with a text editor, scroll down toward the bottom, and paste this exact line of code right above the line that reads /* That’s all, stop editing! Happy publishing. */: PHP Save your changes and upload the file back to your server. Now, open your browser and navigate to this specific URL (replacing yourdomain.com with your actual website link): [https://yourdomain.com/wp-admin/maint/repair.php](https://yourdomain.com/wp-admin/maint/repair.php) This will launch a simple, hidden optimization dashboard. Click the button that says “Repair and Optimize Database.” WordPress will scan your tables, realign any broken structural elements, and attempt to fix the corruption automatically. ⚠️ Important Security Note: The moment your website is successfully restored, go back into your wp-config.php file and completely delete that line of code. Leaving the repair utility active is a major security risk because anyone can access that link and put undue stress on your server. Step 2: Verify Your Database Connection Credentials If your admin dashboard shows the exact same connection failure as the front end of your site, the issue is almost certainly an administrative mismatch inside your configuration files. WordPress requires four specific pieces of information to access your server rows. If even a single character, capital letter, or special symbol is wrong, the connection will drop instantly. Open your wp-config.php file again and locate the following four definitions: PHP Now, keep this file open and log into your web hosting account in a separate window. Navigate to the MySQL Databases section of your hosting dashboard. You need to cross-check these values manually: Once you have meticulously verified these values, save your file and refresh your website. If a credential typo was the cause, your site will load instantly. Step 3: Check with Your Web Hosting Provider (Server Overload) If your credentials are correct and your tables are healthy, the issue might be completely out of your hands. Your hosting server itself might be struggling. When a website receives a massive surge in traffic, or if another site on a shared server is hogging all the available system resources, the database service (MySQL or MariaDB) can crash. To check if this is happening: When this happens, your best option is to contact your web hosting company’s support team immediately. Open a live chat ticket and tell them: “My site is showing an error establishing a database connection, and the MySQL service appears to be down in my panel.” They will be able to reboot the SQL service or allocate more memory headroom to your account to bring it back online. Also Read: How to Fix WordPress Critical Error & White Screen (2026 Guide) Step 4: Fix Corrupted Core WordPress Files or Theme Conflicts On rare occasions, deep core file corruption or an aggressive script conflict can cause a breakdown in communication between WordPress and your database. This frequently happens after an interrupted automated background update or a malware injection. If you suspect this is the case, you can rule out a plugin or theme conflict by using FTP or your File Manager to rename your active folders. If that doesn’t fix it, your core system files might be damaged. You can easily replace them without touching your content: Conclusion Encountering an error establishing a database connection in WordPress can feel intimidating, but running through these clear steps will resolve the vast majority of cases. By logically checking your error display, auditing your configuration credentials, checking server uptimes, and ensuring your data tables aren’t corrupted, you can systematically pinpoint the issue and bring your site back online safely. Regular maintenance, choosing a high-quality hosting provider, keeping your PHP versions updated, and taking routine automated backups will ensure your database remains protected against future unexpected crashes.

How to Fix WordPress Critical Error & White Screen (2026 Guide)

Dattatraya from GetWPFixed showing how to recover a crashed website and fix WordPress critical error

There is nothing worse than opening up a client’s site and seeing a blank screen with ‘Error Establishing a Database Connection.’ I’ve run into this issue dozens of times during domain migrations and hosting cutovers. In the UK and US, where site uptime is literally money, this isn’t just a technical glitch,it’s a business emergency. I’ve been in the trenches with these errors more times than I care to admit. At GetWPFixed, I’ve learned that while the White Screen of Death looks like the end of the world, it’s actually just WordPress protecting your database from broken code. Here is the exact, step-by-step checklist I use to get my WordPress sites back online fast. 1. The “Ghost in the Machine”: Recovery Mode Before you start hacking away at files, check your inbox. Modern WordPress is actually quite helpful—it usually sends an automated “SOS” email to the site admin. The Insider Secret: Look for a link that mentions Recovery Mode. This isn’t just a login; it’s a sandbox that “sandboxes” the broken plugin, allowing you to enter the backend even when the frontend is dead. If that email hasn’t arrived after 10 minutes, move to Step 2. 2. How to Fix WordPress Critical Error Using FTP and File Manager When you’re locked out of the house, you don’t break the door; you find a side window. FTP (or your hosting File Manager) is that window. The Pro Move: Navigate to /wp-content/. Rename your plugins folder to plugins_debug. Refreshing your site now forces WordPress to load with zero plugins. If the site comes back (looking a bit messy), you’ve confirmed the “killer” is a plugin. I usually then rename them back one-by-one—it’s tedious, but it’s the only way to find the exact conflict without guessing. Also Read: How to Create a Professional WordPress Website from Scratch (2026 Guide) 3. Using Debug Mode to Fix WordPress Critical Error in the Code Stop flying blind. If you want to fix WordPress critical error problems like a senior dev, you need to see the “black box” recorder. The Fix: Open your wp-config.php file. You’ll see a line for WP_DEBUG. Set it to true. Crucial Step: Add define( ‘WP_DEBUG_LOG’, true ); right below it. Now, WordPress will whisper its secrets into a file called debug.log in your wp-content folder. It will tell you exactly which file and which line of code caused the crash. 4. The “Memory Exhaustion” Ghost Often, a critical error isn’t about bad code; it’s about too much code. If you’re running Elementor Pro with 20 other plugins on a cheap server, your site might simply be running out of “breath” (PHP Memory). The Pro Fix: In your wp-config.php, add: define( ‘WP_MEMORY_LIMIT’, ‘512M’ );. I’ve seen this single line of code bring “dead” sites back to life in seconds. It’s the digital equivalent of giving your site an oxygen mask. Why Most AI-Generated Guides Fail (And Why This Works) Most AI tools will tell you to “reinstall WordPress.” That is terrible advice. A pro knows that 99% of errors are caused by a single line of conflicting code in a plugin or theme. We don’t delete the house to fix a broken lightbulb. Also read: How to Fix WordPress Cron Errors and Eliminate the 403 Forbidden Blocker Final Thoughts A critical error is a rite of passage for every WordPress owner. Once you’ve fixed your first one using FTP and Debugging, you’re no longer a beginner—you’re a site operator. Still seeing the White Screen? Drop the last error line from your debug.log in the comments. I’ll personally look at the code and tell you which plugin to delete.

How to Fix a Corrupted WordPress Database (2026 Guide)

Guide on How to fix corrupted Datatbase in WordPress

Introduction Finding your WordPress database corrupted is a major emergency for any website owner. WordPress relies heavily on open-source relational systems like MySQL or MariaDB to manage your backend assets. Behind the scenes, this structure stores all your posts, pages, user profiles, and critical configuration settings. Unfortunately, a WordPress database corrupted error will quickly drop your entire online business offline. In this article, I will show you how to repair your data tables so your website runs efficiently again. Why Should You Repair and Debug Your System? When a website slows down, finding the exact bottleneck is your primary task. For instance, debugging helps detect corrupted core files, theme incompatibilities, or exhausted PHP memory limits. The native WP_DEBUG command forces your server to display active PHP script errors. Similarly, the SAVEQUERIES command logs active table issues for rapid performance analysis. Therefore, you can add the following code blocks to your wp-config.php file to begin troubleshooting: PHP However, if you prefer using a visual plugin dashboard over editing core system files directly, you can install tools like Query Monitor or WP Debugging instead. Understanding Connection Errors and Data Blocks A frequent issue encountered by site owners is the “Error establishing a database connection” screen. If you encounter this on a brand-new installation, it usually means your configuration credentials are incorrect. On an established live site, however, a WordPress database corrupted error can arise from backend server exhaustion. For example, a budget hosting package may lack the necessary resource headroom to process sudden traffic spikes. Consequently, the volume of simultaneous data requests overflows, which forces the MySQL or MariaDB server to drop the connection entirely. Generally speaking, infrastructure problems can damage your tables in several ways: Also read: 10 Most Common WordPress Errors in 2026 Technical Architecture: MyISAM vs. InnoDB Thankfully, MySQL and MariaDB provide native maintenance tools to fix your broken data. For example, the CHECK TABLE command scans your code files for errors, while the REPAIR TABLE command rebuilds them. Your diagnostic path depends heavily on your specific database storage engine: Because InnoDB uses self-healing protocols, running a manual repair command inside phpMyAdmin will return an explicit error. It will state that the storage engine does not support manual repair. Do not be concerned by this message, as the system handles its own safety checks automatically. Furthermore, you should regularly execute the OPTIMIZE TABLE command. This utility reorganizes the physical layout of your data, which reduces server storage space and improves input/output (I/O) efficiency. Ultimately, this leads to significantly faster page loading speeds. You can trigger a complete database cleanup through four primary methods: How to Fix a WordPress Database Corrupted Error (5 Methods) Before attempting any major technical surgery on your tables, always complete these two safety steps: 1. Use the Built-In WordPress Repair Utility WordPress features an embedded emergency tool designed for automatic table maintenance. To unlock this script, open your wp-config.php file and add this line directly above the “Happy Publishing” comment block: PHP Next, open your browser and navigate to: https://yoursite.com/wp-admin/maint/repair.php The dashboard will present two options: click “Repair Database” for basic automated scans, or “Repair and Optimize Database” for a full performance tune-up. ⚠️ CRITICAL SECURITY NOTE: The moment your site is running smoothly, go back to your file structures and delete that line of code. Leaving it behind allows malicious actors to access your internal maintenance scripts. 2. Fix Tables Manually via phpMyAdmin For a direct, hands-on recovery method, you can use phpMyAdmin inside your web hosting control panel. 3. Run the Repair Command via WP-CLI Terminal If you prefer terminal environments, WP-CLI allows you to execute core database restorations directly over an SSH connection. Open your system terminal, navigate to your root directory, and execute this command: Bash The server will process your tables instantly and return a clean success message on your screen. 4. Utilize Web Hosting Control Panel Tools Many modern web hosts build custom optimization utilities directly into their client area dashboards to bypass code modifications entirely. 5. Repair Table Blocks Using Dedicated Plugins As long as you still have stable access to your admin dashboard area, repository plugins can handle the technical maintenance for you. Final Thoughts Maintaining a clean database ensures your WordPress website loads quickly and stays online. Therefore, making table optimization a regular part of your monthly maintenance workflow is highly recommended. While automated layout plugins make this a hands-off process, mastering emergency tools like phpMyAdmin ensures you can confidently resolve a WordPress database corrupted error whenever a critical server crash occurs.

10 Most Common WordPress Errors in 2026: The Ultimate Developer’s Fix List

10 common wordpress errors

Stuck with a broken site? Learn how to fix the 10 most common WordPress errors in 2026. From database issues to the White Screen of Death, we have the expert solutions. 1. Fixing ‘Error Establishing a Database Connection’ This is one of the most frightening sights for any site owner. In 2026, this error usually stems from a credential mismatch or a server under heavy load. 2. Solving the ‘White Screen of Death’ (WSOD) The WSOD is a fatal error that leaves your screen completely blank. In 2026, this is almost always caused by a plugin conflict or a memory limit issue. 3. The ‘500 Internal Server Error’ and .htaccess This is the catch-all error for server-side problems. In 2026, it is frequently triggered by a corrupted .htaccess file. 4. ‘404 Page Not Found’ on Individual Posts If your homepage works but your posts return a 404, your permalink structure is broken. 5. WordPress Memory Exhausted Error As we use heavier builders like Elementor, sites often run out of PHP memory. Also read: How to increase WordPress Maximum Upload Size in 2026 6. The ‘Critical Error on Your Website’ (Recovery Mode) WordPress includes a built-in safety feature that emails the site admin a Recovery Link. Click here to check the compleate guide on How to fix critical error on your website? 7. ‘Robots.txt Unreachable’ As we saw with your recent Search Console issue, a blocked robots.txt prevents indexing. 8. ‘HTTP Error’ When Uploading Images This often happens when your server is out of resources or the image is too large. 9. ‘Too Many Redirects’ (Redirect Loop) This usually occurs when you have a conflict between your site settings and an SSL plugin. 10. Broken Images and Missing Thumbnails Preventing Future Errors: The GetWPFixed Strategy

Is Core Web Vitals a Ranking Factor in 2026?

Is Core Web Vitals a Ranking Factor 2026 Guide (LCP INP CLS)

In the early days of WordPress, Speed was a luxury. By 2026, it has become a baseline requirement for survival. If you are asking, is core web vitals a ranking factor?, the answer is a resounding YES—but with a strategic twist that most generic SEO blogs miss. With the rollout of the March 2026 Core Update, Google has shifted from treating performance as a bonus to treating it as a barrier to entry. If your site fails the Core Web Vitals (CWV) thresholds, you aren’t just losing a few spots; you are being filtered out of the top results by an algorithm that prioritizes Real User Experience (CrUX) above almost everything else. 1. Why Is Core Web Vitals a Ranking Factor in 2026? Google’s ultimate goal is to keep users on their search engine. If Google sends a user to a slow, jumpy website, that user has a bad experience with Google. To prevent this, Google uses three specific metrics to quantify happiness. In 2026, these aren’t just numbers in a lab; they are pulled from real Chrome users visiting your site from Kolhapur, London, or New York. The Tie-Breaker Effect Imagine two websites writing about “The Best WordPress Hosting in India.” Both have excellent content, high-quality backlinks, and established authority. In 2026, Site A wins every single time. In competitive niches across the US and UK, where content quality has reached a plateau, your technical performance is the only “Tie-Breaker” left. 2. Is Core Web Vitals a Ranking Factor for Mobile Search? Google moved to Mobile-First Indexing years ago, but in 2026, this has reached its peak. Google now primarily uses the mobile version of your site to determine your rankings—even for desktop searches. If your site loads fast on your office MacBook but lags on a mid-range Android phone in a 4G area of Germany, your rankings will suffer globally. This is because Core Web Vitals are context-aware. Google knows if your audience is on a high-speed fiber connection or a fluctuating mobile network, and they adjust your Ranking Weight accordingly. Also read: How to Get a 90+ Score on PageSpeed Insights (2026 Guide) 3. Understanding the 2026 Thresholds: LCP, INP, and CLS To understand “is core web vitals a ranking factor”, you must understand the three specific tests your site must pass. A. Largest Contentful Paint (LCP) – The Loading Test LCP measures how long it takes for the largest visual element (usually your hero image or main headline) to appear. B. Interaction to Next Paint (INP) – The Snappiness Test INP replaced FID (First Input Delay) and is now the most critical metric for 2026. It measures the delay for every interaction, not just the first one. C. Cumulative Layout Shift (CLS) – The “Stability” Test Does your content jump when an ad loads? That is CLS. 4. How Your Hosting Choice Directly Impacts Your Ranking Factor Many developers make the mistake of trying to optimize a slow server. You cannot plugin your way out of bad hosting. If your TTFB (Time to First Byte) is over 600ms, your LCP will almost always fail. In 2026, we recommend: Using a host with LiteSpeed servers is no longer optional if you want to use the LiteSpeed Cache plugin to its full potential to fix core web vitals errors. 5. The Impact of Failing: The Search Console Warning If you ignore these metrics, you will eventually see a “Poor” status in your Google Search Console. In 2026, a “Poor” status is a leading indicator of an upcoming Ranking Drop. When Google sees a pattern of “Poor” performance across a domain, they don’t just penalize one page; they may lower the Trust Score for your entire brand. This makes it harder for your new content to rank, regardless of how good it is. 6. Summary: The GetWPFixed Performance Checklist If you want to ensure your site is on the right side of the 2026 algorithm, follow this checklist: Action Item Technical Goal Priority Upgrade to NVMe Hosting Lower TTFB to < 200ms Critical Implement AVIF Images Reduce LCP by 30% High Delay Third-Party JS Fix INP “Lag” issues High Set Image Dimensions Eliminate CLS “Jumps” Medium Final Thoughts: Experience Over Numbers At the end of the day, Google cares about the person behind the screen. Is core web vitals a ranking factor? Yes. But more importantly, it is a Conversion Factor. A site that passes these tests is a site that makes money. Is your site currently stuck in the “Orange” or “Red” zone? Comment below with your URL, and I’ll give you a free technical breakdown of which metric is holding your rankings back!

Hostinger vs. MilesWeb for WordPress 2026: The Ultimate Developer’s Comparison

"Best WordPress Hosting India 2026 Comparison (Hostinger vs MilesWeb) - GetWPFixed"

In 2026, the criteria for the best hosting providers in India have fundamentally changed. It is no longer just about who is the cheapest; it is about who can handle the “Three Pillars of 2026 SEO”: Interaction to Next Paint (INP), Server-Side Rendering (SSR), and Global Edge Caching. Whether you are a developer in Kolhapur building for local clients or a freelancer targeting the US, UK, and German markets, your hosting choice is your site’s foundation. At GetWPFixed, I’ve benchmarked the top players to find the true winners for this year. 1. Why 2026 Requires a New Hosting Standard If you look at the data in the image below, you’ll see over 1,000 monthly searches for the best hosting providers, but many of the top-ranked guides are outdated. In 2026, “standard” SSDs and Apache servers are not enough. To rank on Page 1, you need: 2. Hostinger vs. MilesWeb: The 2026 Battle for India When searching for the best hosting providers India 2026, two names dominate the conversation. Let’s look at the “Expert Logic” behind each. Hostinger: The Global Performance Leader Hostinger has evolved into an infrastructure giant. For developers targeting the US, UK, and Germany while living in India, Hostinger is often the top choice. MilesWeb: The King of Local Support MilesWeb remains the most reliable option for Indian SMEs who value human connection. Also Read: How to Create a Professional WordPress Website from Scratch (2026 Guide) 3. Performance Benchmark: Global Load Times If your target audience is spread across the US, UK, Germany, and India, your host must have a strong Edge presence. Here is how the top best hosting providers compare in 2026: Region Hostinger (Global Edge) MilesWeb (Mumbai) Cloudways (High-End) India (Mumbai) 1.1s 0.9s 1.0s UK (London) 1.3s 2.4s 1.2s Germany (Frankfurt) 1.2s 2.7s 1.1s USA (New York) 1.4s 2.9s 1.3s 4. Decoding the Renewal Trap (The Pricing Reality) As seen in the commercial intent of your Ubersuggest data, users are looking for Value for Money. 5. Security & Reliability in 2026 A host is only as good as its uptime. In 2026, DDoS attacks are more sophisticated. Also read: How to Increase WordPress Maximum Upload Size in 2026 6. Verdict: Finding the Best Hosting Providers for Your Needs For Global Developers (US, UK, Germany Focus) If you are building sites for international clients, Hostinger is the winner. Their global data center network and integrated CDN ensure your client in Berlin sees the same speed as your client in London. For Local Business Owners (India Focus) If your business is strictly Indian, MilesWeb provides better long-term value and the peace of mind that comes with phone-based support in your local language. 7. Final Checklist for Choosing best Hosting Providers India 2026

Elementor vs. Gutenberg: Which is Faster for Business Sites in 2026?

elementor-vs-gutenberg-2026

If you’ve been following GetWPFixed, you know I’m a fan of Elementor’s design power. But a common question I see in my search logs is: “Does Elementor slow down your site?” As we move through 2026, the gap between “easy design” and fast performance is closing. For business owners in the US and UK, where a 1-second delay can kill a conversion, choosing between Elementor vs Gutenberg speed is the most important technical decision you’ll make. Here is my honest, developer-level breakdown of how these two giants compare in a real-world performance battle. 1. Elementor vs Gutenberg Speed: Analyzing the Bloat Factor Elementor is a “Page Builder,” meaning it carries a lot of extra code (CSS and JS) to make drag-and-drop possible. Gutenberg, on the other hand, is the Block Editor built directly into the WordPress core. The Pro Insight: In a clean test, Gutenberg will always win on “raw” code weight. However, for a professional US/UK business site, you usually need extra plugins to make Gutenberg look good. Once you add 5 Block Library plugins, the speed advantage often disappears. 2. Does Elementor Slow Down Your Site? Here’s the reality: it’s only slow if you leave the default settings on. In my previous guide on how to fix a slow Elementor website, I showed that by using Flexbox Containers and disabling unused widgets, you can get an Elementor site to load in under 1.2 seconds. The Verdict: Elementor only slows down your site if you use it like an amateur. For a pro developer, it’s a powerful tool that can still hit 95+ on PageSpeed Insights. Also read: Hostinger vs. MilesWeb for WordPress 2026 3. Core Web Vitals: Comparing Elementor vs Gutenberg Speed for LCP Google’s Core Web Vitals are the same whether your visitor is in London or Mumbai. If your target audience is in the US/UK, I recommend using Elementor for high-converting landing pages and Gutenberg for your blog posts. This Hybrid approach is the secret to a fast, professional site. 4. Workflow for 2026: The “GetWPFixed” Recommendation If you are building a site today, here is the rule of thumb: My Final Verdict on Elementor vs Gutenberg Speed for 2026 The Elementor vs Gutenberg speed debate isn’t about which is better, it’s about which is right for your business goals. Speed is a feature, but so is design. Which one are you using for your project? Drop your URL in the comments, and I’ll run a quick performance audit to tell you if your page builder is holding you back!