Errors & Troubleshooting Archives - Get WPFixed

How to Fix WordPress Cron Errors and Eliminate the 403 Forbidden Blocker
How to Fix WordPress Cron Errors

Imagine opening your website backend dashboard only to find a massive warning about your site automation being completely frozen. If you use a tool like WP Crontrol, you might see a specific, frustrating message pointing to an unexpected HTTP response code 403. When this happens, your site goes into a silent lockdown. Scheduled articles refuse to publish, your backup plugins skip their routines, and automatic cache cleanups stop working entirely. Over time, this database clutter causes your hosting resources to stretch to their limits, which slows down your loading speeds and hurts your search engine rankings. The good news is that your core installation files are not corrupted. When you face this issue, your web hosting firewall is simply blocking your site from talking to itself. The security system misinterprets internal background automated requests as a malicious attack and shuts them down. Let us walk through the exact process to bypass this security barrier and permanently handle these system issues. Why Firewalls Cause Sites to Fail and Throw 403 Forbidden Issues To understand how to fix WordPress cron errors 403 forbidden issues, you have to look at how the platform manages background tasks. By default, the system uses a core file to trigger tasks every time someone loads a page on your site. The platform opens an internal script that loops back and sends an internet request to check if any tasks are due. If your site is on a shared hosting server or uses a strict security firewall, the system notices this sudden wave of internal requests coming from your own IP address. The firewall flags this behavior as a potential security threat or an attack. To protect the environment, it throws a 403 block, locking your task automation queue in the past. Step by Step Guide to Fix WordPress Cron Errors 403 Forbidden Permanent Routines To restore your backend automation to perfect health, you must follow a clean sequence that bypasses the firewall block, sets up a server level system scheduler, and clears out old database garbage. Step 1: Activate the Alternative Background Routing Config Log into your hosting account and open your File Manager. Go directly to your root folder, locate your configuration file, and open it in the editor interface. Scroll down toward the bottom of the code and place this specific instruction line right above the message that tells you to stop editing: define(‘ALTERNATE_WP_CRON’, true); This instruction forces the platform to run background actions using a redirect method when visitors browse your pages, which smoothly gets around the direct firewall block. Also read: How to Use Advanced Custom Fields Plugin in WordPress (2026 Guide) Step 2: Stop Traffic Loaded Executions to Correctly Fix WordPress Cron Errors 403 Forbidden Issues While the alternative routing rule fixes the initial block, relying on random public page visits to process database scripts can cause performance speed drops when traffic spikes. To keep your system resources light, add this second directive right below the rule you just inserted: define(‘DISABLE_WP_CRON’, true); Step 3: Configure a Real Linux Backend Automation Job in cPanel Save your changes and close the file manager. Go to your main hosting dashboard account and look for the icon labeled Cron Jobs. Create a brand new execution rule and set the frequency settings to run once every fifteen or thirty minutes. In the command input block, paste this exact path, making sure to replace the placeholder with your actual live domain: wget -q -O – [https://yourdomain.com/wp-cron.php?doing_wp_cron](https://yourdomain.com/wp-cron.php?doing_wp_cron) >/dev/null 2>&1 This shifts the entire operational workload onto your hosting server internal terminal, keeping your front facing pages light and free from memory timeouts. Step 4: Clear out the Overdue Scheduled Task Backlog Because your background automation engine was blocked by the firewall security rules for a long time, your database is likely full of thousands of expired temporary rows and old draft records. Install a free management tool like WP Crontrol, head to your cron settings panel, select the checkboxes for the old tasks, choose the remove option from your bulk actions menu, and apply the change. Important Developer Reminder: Once you wipe away the old stuck backlog, you will notice that essential repeating lines needed by optimization tools reappear immediately for their next future run window. This is perfectly healthy behavior. The main objective is simply to clear out the historical logs that were trapped in the past so the new system can work seamlessly. Moving your background scheduler away from browser traffic and into a native server routine stops your hosting account container from hitting strict performance limits. Your blog posts will launch on time, your plugins will update without timeouts, and your automatic optimization features will keep your platform fast, stable, and highly reliable for your clients. Also read: How to Fix ‘Error Establishing a Database Connection’ in WordPress (2026 Guide)
How to Fix ‘Error Establishing a Database Connection’ in WordPress (2026 Guide)
How to Fix Error Establishing a Database Connection

There is nothing quite as frustrating as opening your website only to be greeted by a blank white screen and a single sentence: “Error establishing a database connection.” For any website owner, this message is an instant source of panic. It means your website is completely offline, your visitors cannot access your content, and your business is grinding to a halt. To fix this issue, it helps to understand how your website works behind the scenes. WordPress is split into two main parts: your core files (which control your design and functionality) and your database (which stores all your actual data, like posts, pages, and user settings). When these two parts cannot talk to each other, your site completely breaks down. The good news is that this problem is incredibly common, and it is entirely fixable. In this comprehensive guide, we will look at exactly what causes an error establishing a database connection in WordPress and walk through five practical ways to restore your site safely. What Causes This Connection Error? Before diving into the technical fixes, let’s look at why the connection dropped in the first place. Pinpointing the root cause will help you apply the correct solution faster. Generally speaking, the connection breaks due to one of four main reasons: Now that we know what we are dealing with, let’s step through the troubleshooting process to get your site back online. Step 1: Check if the Error Happens on Your WP-Admin Dashboard The very first diagnostic step you should take is checking whether the error message is identical across your entire website. Open a new browser tab and try to log into your admin dashboard by adding /wp-admin to the end of your domain name. Look closely at what displays on your screen: Also read: How to Fix WordPress Cron Errors and Eliminate the 403 Forbidden Blocker If you are dealing with Case B, WordPress has a hidden, native repair utility built into its core files that can fix this automatically. To activate it, you will need to access your website’s root folder using an FTP client like FileZilla or the File Manager inside your web hosting control panel (like cPanel or hPanel). Once you are inside your root directory, locate your wp-config.php file. Open it with a text editor, scroll down toward the bottom, and paste this exact line of code right above the line that reads /* That’s all, stop editing! Happy publishing. */: PHP Save your changes and upload the file back to your server. Now, open your browser and navigate to this specific URL (replacing yourdomain.com with your actual website link): [https://yourdomain.com/wp-admin/maint/repair.php](https://yourdomain.com/wp-admin/maint/repair.php) This will launch a simple, hidden optimization dashboard. Click the button that says “Repair and Optimize Database.” WordPress will scan your tables, realign any broken structural elements, and attempt to fix the corruption automatically. ⚠️ Important Security Note: The moment your website is successfully restored, go back into your wp-config.php file and completely delete that line of code. Leaving the repair utility active is a major security risk because anyone can access that link and put undue stress on your server. Step 2: Verify Your Database Connection Credentials If your admin dashboard shows the exact same connection failure as the front end of your site, the issue is almost certainly an administrative mismatch inside your configuration files. WordPress requires four specific pieces of information to access your server rows. If even a single character, capital letter, or special symbol is wrong, the connection will drop instantly. Open your wp-config.php file again and locate the following four definitions: PHP Now, keep this file open and log into your web hosting account in a separate window. Navigate to the MySQL Databases section of your hosting dashboard. You need to cross-check these values manually: Once you have meticulously verified these values, save your file and refresh your website. If a credential typo was the cause, your site will load instantly. Step 3: Check with Your Web Hosting Provider (Server Overload) If your credentials are correct and your tables are healthy, the issue might be completely out of your hands. Your hosting server itself might be struggling. When a website receives a massive surge in traffic, or if another site on a shared server is hogging all the available system resources, the database service (MySQL or MariaDB) can crash. To check if this is happening: When this happens, your best option is to contact your web hosting company’s support team immediately. Open a live chat ticket and tell them: “My site is showing an error establishing a database connection, and the MySQL service appears to be down in my panel.” They will be able to reboot the SQL service or allocate more memory headroom to your account to bring it back online. Also Read: How to Fix WordPress Critical Error & White Screen (2026 Guide) Step 4: Fix Corrupted Core WordPress Files or Theme Conflicts On rare occasions, deep core file corruption or an aggressive script conflict can cause a breakdown in communication between WordPress and your database. This frequently happens after an interrupted automated background update or a malware injection. If you suspect this is the case, you can rule out a plugin or theme conflict by using FTP or your File Manager to rename your active folders. If that doesn’t fix it, your core system files might be damaged. You can easily replace them without touching your content: Conclusion Encountering an error establishing a database connection in WordPress can feel intimidating, but running through these clear steps will resolve the vast majority of cases. By logically checking your error display, auditing your configuration credentials, checking server uptimes, and ensuring your data tables aren’t corrupted, you can systematically pinpoint the issue and bring your site back online safely. Regular maintenance, choosing a high-quality hosting provider, keeping your PHP versions updated, and taking routine automated backups will ensure your database remains protected against future unexpected crashes.

How to Fix WordPress Critical Error & White Screen (2026 Guide)

Dattatraya from GetWPFixed showing how to recover a crashed website and fix WordPress critical error

There is nothing worse than opening up a client’s site and seeing a blank screen with ‘Error Establishing a Database Connection.’ I’ve run into this issue dozens of times during domain migrations and hosting cutovers. In the UK and US, where site uptime is literally money, this isn’t just a technical glitch,it’s a business emergency. I’ve been in the trenches with these errors more times than I care to admit. At GetWPFixed, I’ve learned that while the White Screen of Death looks like the end of the world, it’s actually just WordPress protecting your database from broken code. Here is the exact, step-by-step checklist I use to get my WordPress sites back online fast. 1. The “Ghost in the Machine”: Recovery Mode Before you start hacking away at files, check your inbox. Modern WordPress is actually quite helpful—it usually sends an automated “SOS” email to the site admin. The Insider Secret: Look for a link that mentions Recovery Mode. This isn’t just a login; it’s a sandbox that “sandboxes” the broken plugin, allowing you to enter the backend even when the frontend is dead. If that email hasn’t arrived after 10 minutes, move to Step 2. 2. How to Fix WordPress Critical Error Using FTP and File Manager When you’re locked out of the house, you don’t break the door; you find a side window. FTP (or your hosting File Manager) is that window. The Pro Move: Navigate to /wp-content/. Rename your plugins folder to plugins_debug. Refreshing your site now forces WordPress to load with zero plugins. If the site comes back (looking a bit messy), you’ve confirmed the “killer” is a plugin. I usually then rename them back one-by-one—it’s tedious, but it’s the only way to find the exact conflict without guessing. Also Read: How to Create a Professional WordPress Website from Scratch (2026 Guide) 3. Using Debug Mode to Fix WordPress Critical Error in the Code Stop flying blind. If you want to fix WordPress critical error problems like a senior dev, you need to see the “black box” recorder. The Fix: Open your wp-config.php file. You’ll see a line for WP_DEBUG. Set it to true. Crucial Step: Add define( ‘WP_DEBUG_LOG’, true ); right below it. Now, WordPress will whisper its secrets into a file called debug.log in your wp-content folder. It will tell you exactly which file and which line of code caused the crash. 4. The “Memory Exhaustion” Ghost Often, a critical error isn’t about bad code; it’s about too much code. If you’re running Elementor Pro with 20 other plugins on a cheap server, your site might simply be running out of “breath” (PHP Memory). The Pro Fix: In your wp-config.php, add: define( ‘WP_MEMORY_LIMIT’, ‘512M’ );. I’ve seen this single line of code bring “dead” sites back to life in seconds. It’s the digital equivalent of giving your site an oxygen mask. Why Most AI-Generated Guides Fail (And Why This Works) Most AI tools will tell you to “reinstall WordPress.” That is terrible advice. A pro knows that 99% of errors are caused by a single line of conflicting code in a plugin or theme. We don’t delete the house to fix a broken lightbulb. Also read: How to Fix WordPress Cron Errors and Eliminate the 403 Forbidden Blocker Final Thoughts A critical error is a rite of passage for every WordPress owner. Once you’ve fixed your first one using FTP and Debugging, you’re no longer a beginner—you’re a site operator. Still seeing the White Screen? Drop the last error line from your debug.log in the comments. I’ll personally look at the code and tell you which plugin to delete.

How to Fix a Corrupted WordPress Database (2026 Guide)

Guide on How to fix corrupted Datatbase in WordPress

Introduction Finding your WordPress database corrupted is a major emergency for any website owner. WordPress relies heavily on open-source relational systems like MySQL or MariaDB to manage your backend assets. Behind the scenes, this structure stores all your posts, pages, user profiles, and critical configuration settings. Unfortunately, a WordPress database corrupted error will quickly drop your entire online business offline. In this article, I will show you how to repair your data tables so your website runs efficiently again. Why Should You Repair and Debug Your System? When a website slows down, finding the exact bottleneck is your primary task. For instance, debugging helps detect corrupted core files, theme incompatibilities, or exhausted PHP memory limits. The native WP_DEBUG command forces your server to display active PHP script errors. Similarly, the SAVEQUERIES command logs active table issues for rapid performance analysis. Therefore, you can add the following code blocks to your wp-config.php file to begin troubleshooting: PHP However, if you prefer using a visual plugin dashboard over editing core system files directly, you can install tools like Query Monitor or WP Debugging instead. Understanding Connection Errors and Data Blocks A frequent issue encountered by site owners is the “Error establishing a database connection” screen. If you encounter this on a brand-new installation, it usually means your configuration credentials are incorrect. On an established live site, however, a WordPress database corrupted error can arise from backend server exhaustion. For example, a budget hosting package may lack the necessary resource headroom to process sudden traffic spikes. Consequently, the volume of simultaneous data requests overflows, which forces the MySQL or MariaDB server to drop the connection entirely. Generally speaking, infrastructure problems can damage your tables in several ways: Also read: 10 Most Common WordPress Errors in 2026 Technical Architecture: MyISAM vs. InnoDB Thankfully, MySQL and MariaDB provide native maintenance tools to fix your broken data. For example, the CHECK TABLE command scans your code files for errors, while the REPAIR TABLE command rebuilds them. Your diagnostic path depends heavily on your specific database storage engine: Because InnoDB uses self-healing protocols, running a manual repair command inside phpMyAdmin will return an explicit error. It will state that the storage engine does not support manual repair. Do not be concerned by this message, as the system handles its own safety checks automatically. Furthermore, you should regularly execute the OPTIMIZE TABLE command. This utility reorganizes the physical layout of your data, which reduces server storage space and improves input/output (I/O) efficiency. Ultimately, this leads to significantly faster page loading speeds. You can trigger a complete database cleanup through four primary methods: How to Fix a WordPress Database Corrupted Error (5 Methods) Before attempting any major technical surgery on your tables, always complete these two safety steps: 1. Use the Built-In WordPress Repair Utility WordPress features an embedded emergency tool designed for automatic table maintenance. To unlock this script, open your wp-config.php file and add this line directly above the “Happy Publishing” comment block: PHP Next, open your browser and navigate to: https://yoursite.com/wp-admin/maint/repair.php The dashboard will present two options: click “Repair Database” for basic automated scans, or “Repair and Optimize Database” for a full performance tune-up. ⚠️ CRITICAL SECURITY NOTE: The moment your site is running smoothly, go back to your file structures and delete that line of code. Leaving it behind allows malicious actors to access your internal maintenance scripts. 2. Fix Tables Manually via phpMyAdmin For a direct, hands-on recovery method, you can use phpMyAdmin inside your web hosting control panel. 3. Run the Repair Command via WP-CLI Terminal If you prefer terminal environments, WP-CLI allows you to execute core database restorations directly over an SSH connection. Open your system terminal, navigate to your root directory, and execute this command: Bash The server will process your tables instantly and return a clean success message on your screen. 4. Utilize Web Hosting Control Panel Tools Many modern web hosts build custom optimization utilities directly into their client area dashboards to bypass code modifications entirely. 5. Repair Table Blocks Using Dedicated Plugins As long as you still have stable access to your admin dashboard area, repository plugins can handle the technical maintenance for you. Final Thoughts Maintaining a clean database ensures your WordPress website loads quickly and stays online. Therefore, making table optimization a regular part of your monthly maintenance workflow is highly recommended. While automated layout plugins make this a hands-off process, mastering emergency tools like phpMyAdmin ensures you can confidently resolve a WordPress database corrupted error whenever a critical server crash occurs.

10 Most Common WordPress Errors in 2026: The Ultimate Developer’s Fix List

10 common wordpress errors

Stuck with a broken site? Learn how to fix the 10 most common WordPress errors in 2026. From database issues to the White Screen of Death, we have the expert solutions. 1. Fixing ‘Error Establishing a Database Connection’ This is one of the most frightening sights for any site owner. In 2026, this error usually stems from a credential mismatch or a server under heavy load. 2. Solving the ‘White Screen of Death’ (WSOD) The WSOD is a fatal error that leaves your screen completely blank. In 2026, this is almost always caused by a plugin conflict or a memory limit issue. 3. The ‘500 Internal Server Error’ and .htaccess This is the catch-all error for server-side problems. In 2026, it is frequently triggered by a corrupted .htaccess file. 4. ‘404 Page Not Found’ on Individual Posts If your homepage works but your posts return a 404, your permalink structure is broken. 5. WordPress Memory Exhausted Error As we use heavier builders like Elementor, sites often run out of PHP memory. Also read: How to increase WordPress Maximum Upload Size in 2026 6. The ‘Critical Error on Your Website’ (Recovery Mode) WordPress includes a built-in safety feature that emails the site admin a Recovery Link. Click here to check the compleate guide on How to fix critical error on your website? 7. ‘Robots.txt Unreachable’ As we saw with your recent Search Console issue, a blocked robots.txt prevents indexing. 8. ‘HTTP Error’ When Uploading Images This often happens when your server is out of resources or the image is too large. 9. ‘Too Many Redirects’ (Redirect Loop) This usually occurs when you have a conflict between your site settings and an SSL plugin. 10. Broken Images and Missing Thumbnails Preventing Future Errors: The GetWPFixed Strategy

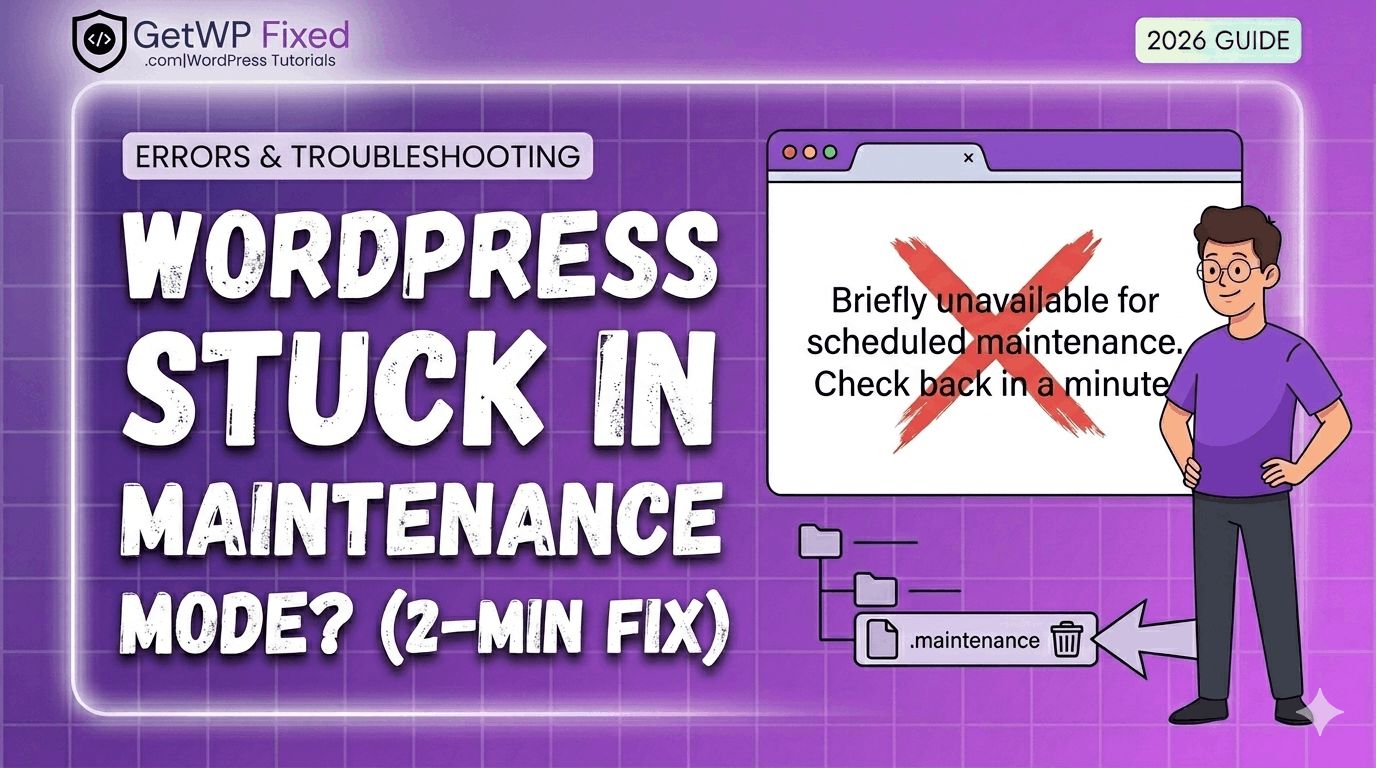
WordPress Stuck in Maintenance Mode? (Don’t Panic, Here’s the 2-Minute Fix)

WordPress stuck in maintenance mode

We’ve all been there. It’s 10:00 PM, you’re just finishing up some routine site maintenance, and you see that red “Update” bubble on a plugin. You think, “I’ll just click this quickly before I log off.” You click Update. Your screen refreshes. And suddenly, your entire website—your beautifully designed homepage, your valuable blog posts, your online store—is gone. It’s replaced by a single, terrifying line of plain, white text on a blank screen: “Briefly unavailable for scheduled maintenance. Check back in a minute.” Ten minutes go by. You check back. It’s still there. You try your admin dashboard. It’s blocked, too. Panic starts to set in. At GetWPFixed, I see this issue almost every week. If this is happening to you right now, the first thing I want you to do is take a deep breath. I promise you didn’t break your website. Your data is safe. This isn’t a hack, and it’s not a server crash. It’s just a tiny, stubborn “ghost” file that didn’t delete itself correctly. This is my definitive 2026 guide to resolving this error. By the end of this post, you will understand exactly why this happens, how to fix it in two minutes (most of the time), and how to prevent it from ever happening again. Let’s get your site back online. Part 1: Why Does WordPress Get Stuck in Maintenance Mode? (The Science Behind the Error) To fix the problem permanently, it helps to understand what’s happening behind the scenes. This error is actually a feature, not a bug. 1.1 The Maintenance Mode Process When you click the update button for a core WordPress file, a theme, or a plugin, WordPress needs a “safe space” to make those changes. It can’t have live users navigating the database while it’s trying to rewrite its core files. Here is the four-step “Handshake” process that should happen: 1.2 The Failure: What Went Wrong? The problem occurs when Step 3 finishes but Step 4 fails. The update completes, but the handshake gets “confused,” and the .maintenance file is never deleted. Your site remains locked, still displaying the “DO NOT DISTURB” sign. The most common reasons for this failure are: Now that we know why we are stuck, let’s fix it. Part 2: The Easiest Fix (Try This First) Before we start messing with files and code, try the simplest “non-techy” solutions. There is a 90% chance one of these two steps will fix it instantly. Fix #1: Force Refresh (The Hard Refresh) Sometimes, your site is actually already fixed, but your browser is still showing you a “cached” version of the error. A standard refresh won’t work. You need to tell your browser: “Forget everything you think you know about this URL, and load a fresh version from the server.” This is called a “Hard Refresh” or “Clear Cache for this Page.” Fix #2: Clear Your Browser Cache and Cookies If the hard refresh didn’t work, your browser might be stubbornly clinging to the memory of that error page in its cookies. Try opening your site in an Incognito or Private window. If it loads there, you are fixed! Just clear your browser cache and cookies, and your standard window will work again. Part 3: The Technical Fix (Deleting the Stubborn File) If you have tried the “easy fixes” and your site is still showing the maintenance message, you have to get your hands dirty. We need to manually delete that .maintenance file. Don’t panic—this is as scary as it sounds. You just need access to your site’s root directory (the core “filing cabinet” of your WordPress install). What You Will Need There are two ways to do this. I will show you both. Method A: Using CPanel’s File Manager (Easiest Method) If your host uses CPanel (common with hosts like Bluehost, SiteGround, and many others), this is the fastest way to fix the problem. What If I Don’t See the .maintenanceFile? This is a common frustration. In some File Managers, “hidden” files are disabled by default. If you are in the public_html folder and don’t see the file, look for a “Settings” or “Preferences” cog icon (usually in the top-right corner). Click it, and check the box that says “Show Hidden Files (dotfiles).” The .maintenance file should now appear. Method B: Using an FTP Client (The Developer Way) If you don’t use CPanel or prefer to use an FTP client, you can follow these steps. For this example, I am using FileZilla (which is free and safe). Part 4: Advanced Troubleshooting (What If Method A and B Failed?) So, you’ve deleted the .maintenance file, you’ve cleared your cache, and your site is still stuck. This is a much rarer scenario, but it happens. If deleting the file didn’t work, it means that the problem wasn’t the .maintenance file at all—it means your server is physically stuck in the middle of a conflict and doesn’t know how to stop. Here is what you need to do next, in order of likelihood: 4.1 Check Your PHP Memory Limit A very common reason an update fails in 2026 is that the update itself required more temporary “brainpower” (memory) than your host allows. If your site hit its limit, the update process stopped, but the maintenance signal got stuck. You can increase this limit easily by adding a line to your wp-config.php file (the same place you found that .maintenance file!). Open wp-config.php and paste this line just before the text that says “That’s all, stop editing! Happy publishing.”: define(‘WP_MEMORY_LIMIT’, ‘512M’); We have a dedicated [post on fixing memory limit errors] if you need more help with this! Increasing the memory often “nudges” the server to complete the pending processes. 4.2 Manually Deactivate Your Plugins If increasing the memory didn’t work, we must assume that one of your plugins (the one you just tried to update, or another one) is in an active conflict. Since you can’t access your admin dashboard to disable them, we have to do it … Read more

How to Increase WordPress Maximum Upload Size in 2026 (Working Fix)

Increase Maximum File Upload Size in WordPress

⚠️ SAFETY FIRST: Before making any technical changes or editing your site’s code, please ensure you have a full backup of your website and database. If you aren’t comfortable editing files, consider using a staging site first. Need professional help? [Contact Us]. If you are looking to increase maximum file upload size in WordPress in 2026 , you’ve likely run into the frustrating ‘upload_max_filesize’ error. By default, many hosting providers set this limit as low as 2MB or 8MB—which is barely enough for a single high-resolution photo today. The Symptom: What are you seeing? When you go to Media > Add New, you will see a small text label that says: “Maximum upload file size: 2 MB.” If your file is even 0.1KB over that limit, WordPress will block the upload and show a red error bar. The Quick Fix (1-Minute Solution) If you have a modern host with cPanel or Plesk, don’t touch any code yet! 5 Proven Methods to Increase Maximum File Upload Size in WordPress. If the Quick Fix didn’t work, one of these technical methods will. We have ranked them from easiest to most advanced. Method 1: The functions.php Method (Theme Level) This is the easiest way to tell WordPress to request more “room” from the server. PHP @ini_set( ‘upload_max_size’ , ’64M’ ); @ini_set( ‘post_max_size’, ’64M’); @ini_set( ‘max_execution_time’, ‘300’ ); Method 2: The .htaccess Method (Apache Servers) If you are on shared hosting (Bluehost, BigRock, MilesWeb etc.), your .htaccess file usually controls these rules. Plaintext upload_max_filesize = 64Mpost_max_size = 64Mmemory_limit = 256M Method 3: The php.ini or .user.ini Method Some hosts require a dedicated configuration file in your root folder. Plaintext upload_max_filesize = 64M post_max_size = 64M memory_limit = 256M Method 4: The wp-config.php Method While less common for upload sizes specifically, increasing your WP Memory Limit often fixes the “timeout” errors that happen during large uploads. PHP define(‘WP_MEMORY_LIMIT’, ‘256M’); Prevention: How to avoid this in the future Still Stuck? Sometimes, no matter what you code, the hosting provider hard-locks these limits. If you’ve tried all four methods and your limit is still 2MB, it’s time to contact your host’s support or Let GetWpFixed handle it for you. Next Post:How to Fix a Slow WordPress Website: The Ultimate 2026 Speed Guide