
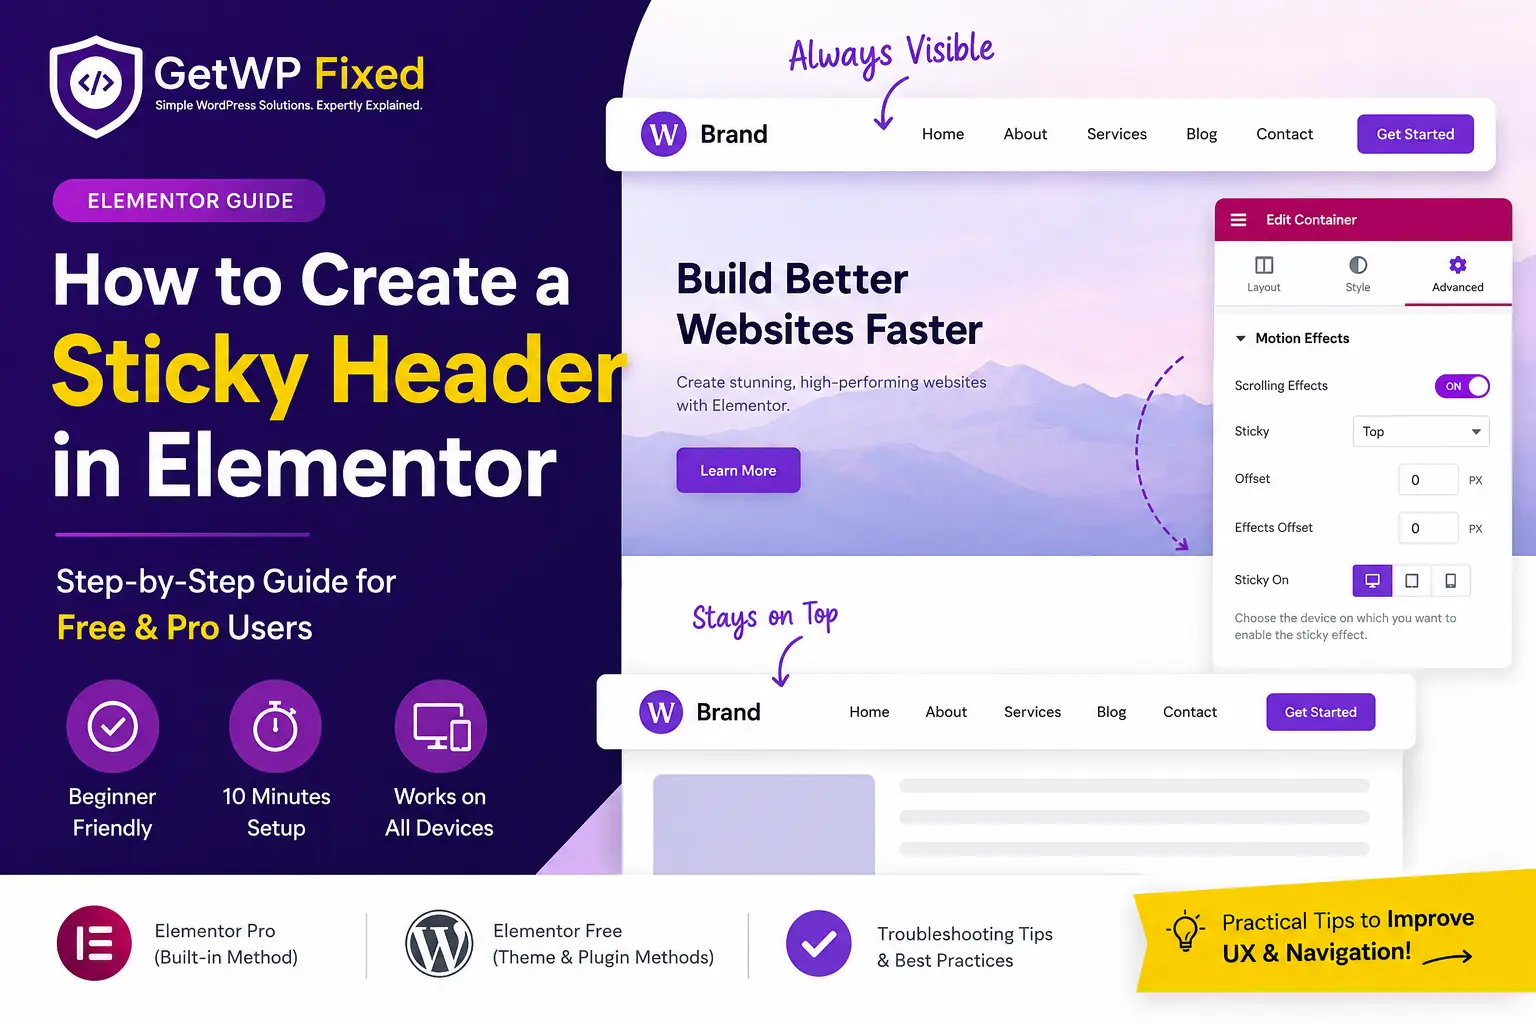
A sticky header keeps your website’s navigation visible as visitors scroll down the page. It improves user experience by making menus, logos, and call-to-action buttons accessible at all times. If you’re using Elementor, you can create a professional sticky header in just a few minutes using Elementor Pro or a free alternative.
In this guide, you’ll learn how to create a sticky header in Elementor step by step, along with common mistakes to avoid and solutions if it doesn’t work as expected.
Quick Answer
If you’re using Elementor Pro, open your header template, select the parent container, go to Advanced → Motion Effects, set Sticky to Top, and publish the changes. If you’re using Elementor Free, you can achieve a similar result using your theme’s built-in sticky header option or a lightweight WordPress plugin.
At a Glance
| Item | Details |
|---|---|
| Difficulty | Beginner |
| Time Required | 10 Minutes |
| Elementor Version | Free & Pro |
| WordPress Version | 6.0 or later |
| Recommended Method | Elementor Pro |
| Last Updated | July 2026 |
What Is an Elementor Sticky Header?
An Elementor sticky header is a header that stays fixed at the top of the screen while visitors scroll through your website. Instead of disappearing when users move down the page, it remains visible, allowing quick access to your navigation menu, logo, search bar, or contact button.
For example, imagine you’re reading a long blog post and want to visit another page. Without a sticky header, you’d have to scroll back to the top to find the navigation menu. With a sticky header, the menu is always available, making navigation faster and more convenient.
Most business websites, online stores, portfolios, and SaaS websites use sticky headers because they improve usability and help visitors move around the site more efficiently.
💡 Pro Tip: Apply the sticky effect to the parent header container, not just the Navigation Menu widget. This ensures your logo, menu, and action buttons stay together while scrolling.
Why Should You Use a Sticky Header?
A sticky header isn’t just a design trend, it offers real usability benefits.
Benefits of a Sticky Header
| Benefit | Why It Matters |
|---|---|
| Better Navigation | Visitors can access the menu anytime without scrolling back to the top. |
| Improved User Experience | Makes browsing smoother, especially on long pages. |
| Higher Engagement | Users are more likely to explore additional pages. |
| Increased Conversions | Important buttons like Contact, Book Now, or Shop remain visible. |
| Professional Appearance | Creates a polished, modern website experience. |
Sticky headers are especially useful for:
- Business websites
- WooCommerce stores
- Agency websites
- Blogs
- Portfolio websites
- Landing pages
Before You Start
Before creating a sticky header, make sure you have the following:
- ✅ WordPress installed
- ✅ Elementor plugin installed
- ✅ Elementor Pro (recommended for the easiest method)
- ✅ A header created using Elementor Theme Builder
If you’re using Elementor Free, don’t worry. We’ll also cover an alternative method later in this guide.
How to Create a Sticky Header in Elementor Pro
Elementor Pro includes a built-in Sticky feature, making it the easiest and most reliable way to create a sticky header.
Follow these steps:
Step 1: Open Your Header Template
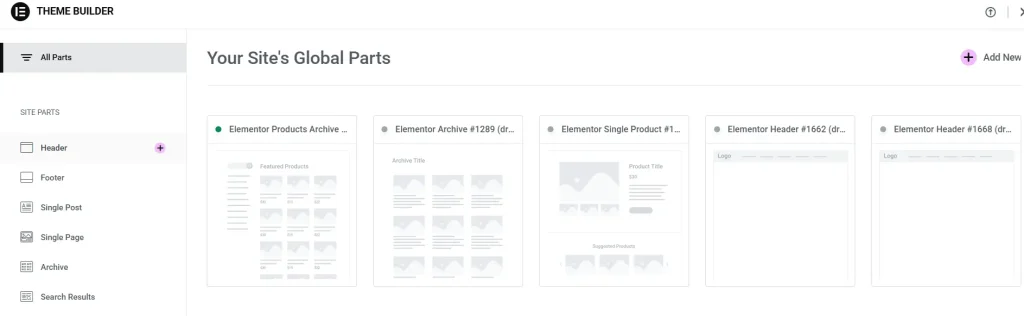
In your WordPress dashboard, go to:
Templates → Theme Builder → Header
Open the header you want to make sticky by clicking Edit with Elementor.
Step 2: Select the Parent Header Container
Click the outermost header container (or section if you’re using the older layout).
This is one of the most common mistakes beginners make. If you select only the Navigation Menu widget, the menu may stay fixed while the logo and other header elements scroll away.
Always apply the sticky settings to the entire header container.
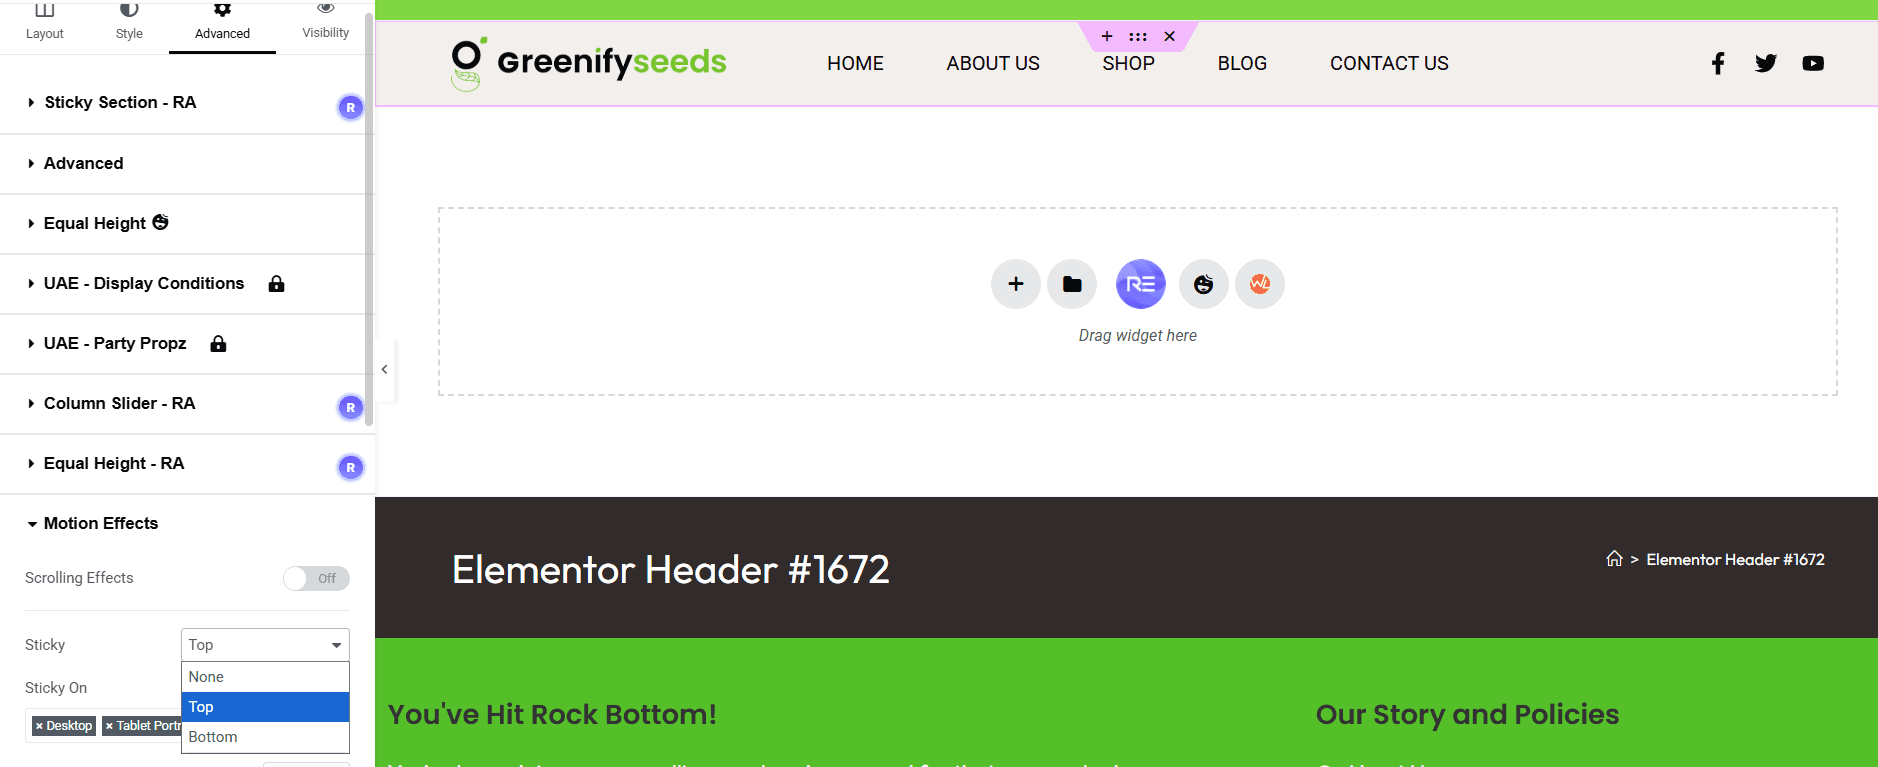
Step 3: Enable the Sticky Option
With the header container selected:
Go to:
Advanced → Motion Effects
Under Sticky, choose:
Top
This tells Elementor to keep the header attached to the top of the browser window while visitors scroll.
Step 4: Choose Where the Sticky Header Works
Under Sticky On, select the devices where you want the sticky header to appear.
For most websites, enabling it on Desktop, Tablet, and Mobile works well. However, if your header is large, you may prefer to disable it on mobile to save screen space.
💡 Pro Tip: Test your sticky header on a real mobile device. A header that looks perfect on desktop may feel oversized on a smaller screen.
Step 5: Publish and Test
Click Update to save your changes.
Now visit your website and scroll down the page. Your header should remain fixed at the top while the rest of the content moves underneath it.
If it doesn’t, don’t worry we’ll cover the most common fixes later in this guide.
How to Create a Sticky Header in Elementor Free
If you’re using Elementor Free, you won’t find the Sticky option under Motion Effects because it’s an Elementor Pro feature.
The good news is that you can still create a sticky header without upgrading. The two easiest methods are using your WordPress theme’s built-in sticky header feature or installing a lightweight sticky header plugin.
Method 1: Use Your Theme’s Sticky Header Feature (Recommended)
Many modern WordPress themes already include a sticky header option. If your theme supports it, this is the simplest and most reliable solution because it doesn’t require additional plugins.
Popular themes with sticky header support include:
- Astra
- Kadence
- Blocksy
- OceanWP
- Neve
- GeneratePress Premium
Step 1: Open the WordPress Customizer
From your WordPress dashboard, navigate to:
Appearance → Customize
Step 2: Open Header Settings
Depending on your theme, the option may be named:
- Header
- Header Builder
- Primary Header
- Navigation
Open the header settings and look for a Sticky Header or Fixed Header option.
Step 3: Enable Sticky Header
Turn on the Sticky Header option and publish your changes.
Visit your website and scroll down the page to confirm that the header remains fixed at the top.
💡 Pro Tip: If your theme already supports sticky headers, use that feature instead of installing another plugin. Fewer plugins generally mean better performance and fewer compatibility issues.
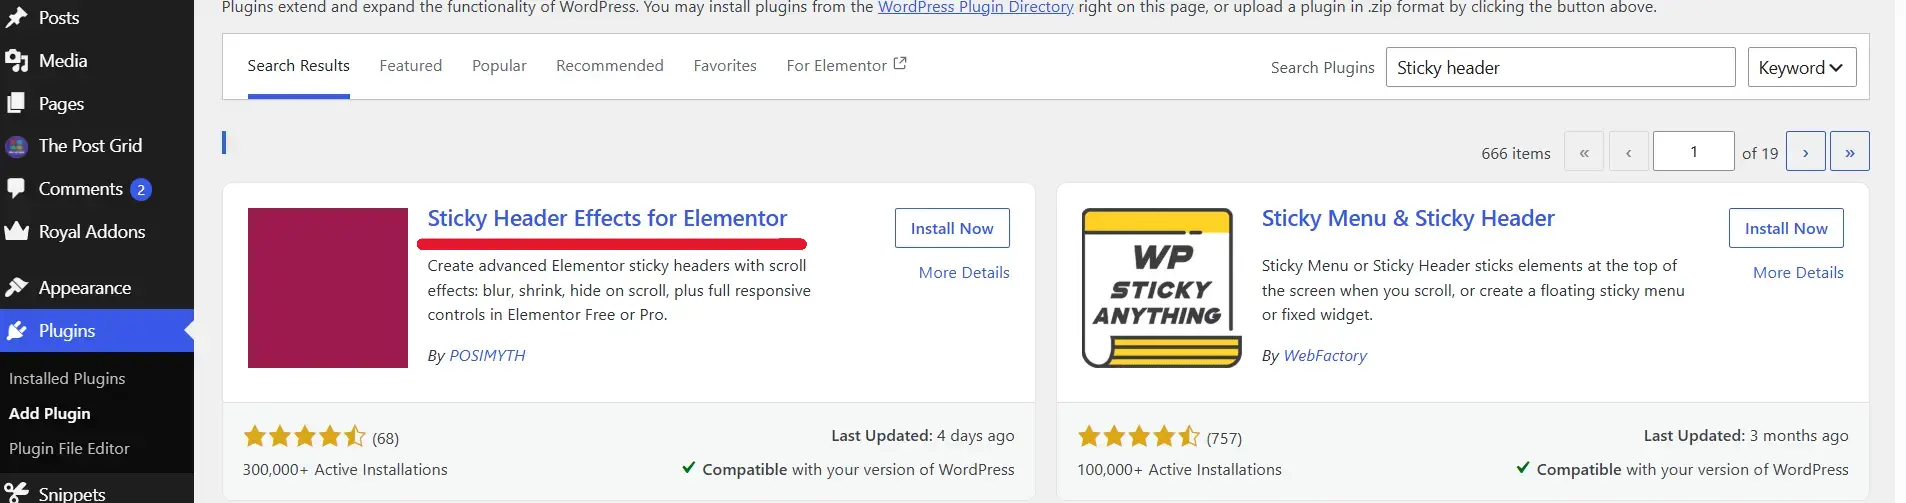
Method 2: Use a Sticky Header Plugin
If your theme doesn’t include a sticky header feature, you can use a dedicated WordPress plugin.
Choose a plugin that is:
- Regularly updated
- Compatible with your WordPress version
- Lightweight
- Well-rated by users
After installing the plugin:
- Activate it.
- Open its settings page.
- Select your website’s header.
- Enable the sticky option.
- Save your settings.
- Test your website on desktop and mobile devices.
⚠️ Common Mistake: Don’t install multiple sticky header plugins. Running more than one can cause flickering, duplicate headers, or unexpected layout issues.
Elementor Sticky Header Not Working? Here’s How to Fix It
If your sticky header isn’t working as expected, don’t panic. In most cases, the issue is caused by an incorrect setting, caching, or a theme conflict.
Here are the most common fixes.
1. You Selected the Wrong Element
The sticky effect should be applied to the main header container, not to individual widgets like the Navigation Menu or Logo.
Applying it to only one widget can cause parts of the header to scroll away while others remain fixed.
Solution: Select the outermost header container and enable the sticky option there.
2. Motion Effects Option Is Missing
If you can’t find Advanced → Motion Effects → Sticky, you’re most likely using Elementor Free.
Solution: Either upgrade to Elementor Pro or use your theme’s sticky header feature or a dedicated plugin.
3. Your Changes Aren’t Showing
Sometimes the sticky header is working, but cached files prevent you from seeing the latest version.
Solution:
- Clear your browser cache.
- Clear your WordPress caching plugin.
- Purge your CDN cache if you’re using Cloudflare or another CDN.
- Refresh the page using Ctrl + F5 (Windows) or Cmd + Shift + R (Mac).
4. Header Appears Behind the Content
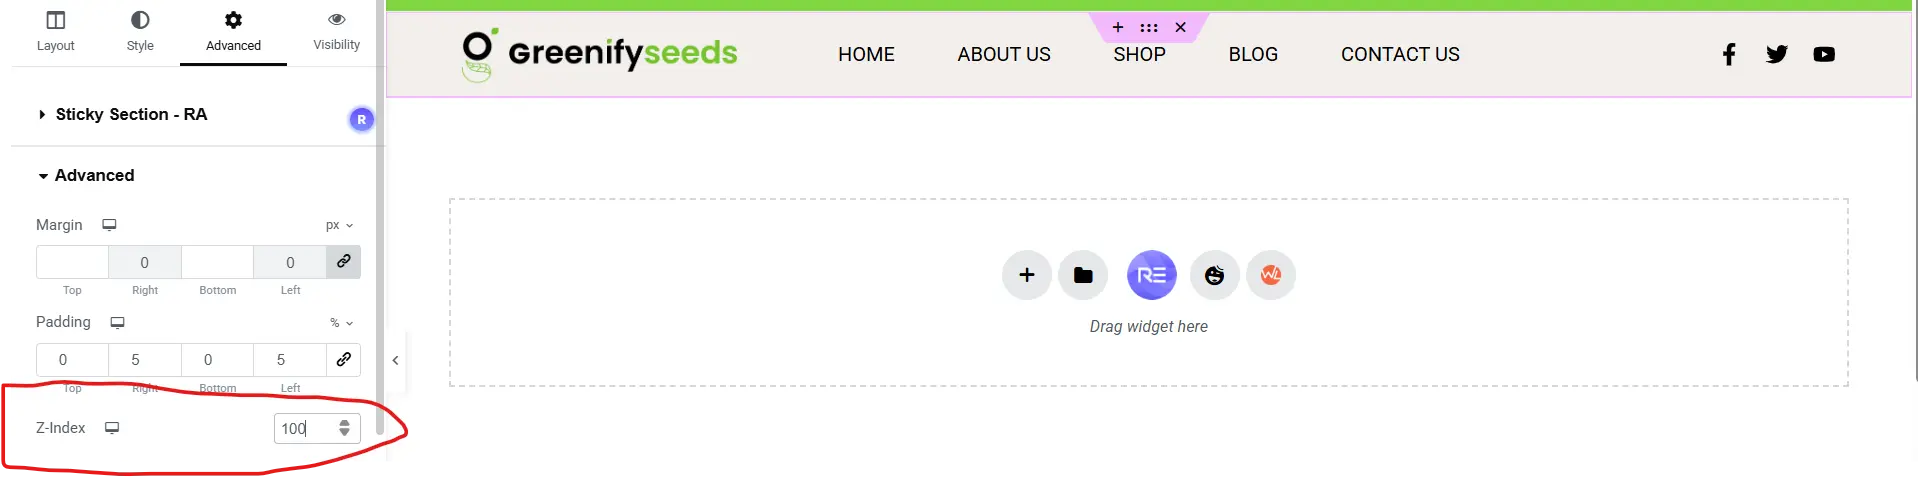
If your header disappears behind page content while scrolling, it’s usually a z-index issue.
Solution:
Increase the header’s Z-Index value under:
Advanced → Layout → Z-Index
A value between 100 and 999 is sufficient for most websites.
5. Sticky Header Doesn’t Work on Mobile
Some themes or plugins disable sticky headers on smaller devices by default.
Solution:
Check the Sticky On settings and make sure Mobile is enabled if you want the header to remain sticky on smartphones.
Also test on a real device instead of relying only on Elementor’s responsive preview.
Best Practices for Sticky Headers
A sticky header should improve the browsing experience, not distract visitors.
Follow these best practices to get the best results.
Keep the Header Compact
A header that’s too tall takes up valuable screen space.
A height of 70–90px works well for most websites.
Use a Solid Background While Scrolling
Transparent headers look great over hero images, but they can become difficult to read over regular page content.
Switch to a solid background color once users begin scrolling to improve readability.
Avoid Heavy Animations
Simple transitions look professional.
Overly complex animations can feel distracting and may affect performance on slower devices.
Test on All Devices
Always check your sticky header on:
- Desktop
- Tablet
- Mobile
Pay special attention to menu spacing and button sizes on smaller screens.
Keep Important Actions Visible
If your header includes buttons such as Contact, Book Now, or Shop, make sure they remain visible without making the header feel cluttered.
Also read: How to Use Advanced Custom Fields Plugin in WordPress (2026 Guide)
Frequently Asked Questions
Can I create a sticky header with Elementor Free?
Yes, but not using Elementor’s built-in sticky feature. Elementor Free doesn’t include the Motion Effects → Sticky option. You can still create a sticky header by using your theme’s built-in feature or a compatible WordPress plugin.
Does a sticky header affect website speed?
A properly implemented sticky header has little to no impact on performance. However, using multiple sticky header plugins, heavy animations, or large JavaScript libraries can slow down your website.
For the best performance, use Elementor Pro’s native sticky feature or your theme’s built-in functionality whenever possible.
Why is my sticky header covering my page content?
This usually happens when the header overlaps the content below it. Common causes include:
- Header height is too large
- Incorrect top spacing
- Z-index conflicts
- Missing top padding on the page content
Review your header layout and adjust the spacing if necessary.
Can I make the header transparent before scrolling?
Yes. Elementor Pro allows you to combine a transparent header with sticky effects. A common design pattern is:
- Before scrolling: Transparent background with light-colored text
- After scrolling: Solid background with darker text
This creates a modern appearance while keeping the navigation readable as visitors move through the page.
Should I enable sticky headers on mobile devices?
It depends on your website. For most business websites and online stores, a sticky header on mobile improves navigation. However, if your header is large or contains too many elements, it may reduce the visible screen space.
Always test the mobile experience before enabling it for all visitors.
Best Practices Checklist
Before publishing your website, use this checklist to ensure your sticky header works correctly.
- Apply the sticky effect to the parent header container.
- Keep the header height between 70–90px.
- Use a solid background after scrolling for better readability.
- Test the sticky header on desktop, tablet, and mobile.
- Check dropdown menus and search functionality.
- Clear your website and browser cache after making changes.
- Avoid installing multiple sticky header plugins.
- Keep animations subtle to maintain a smooth browsing experience.
Following these practices will help you create a sticky header that looks professional and performs well across all devices.
Final Thoughts
A sticky header is a small feature that can make a significant difference to your website’s usability. By keeping your navigation visible, visitors can move around your site more easily, leading to a smoother browsing experience and potentially higher engagement.
If you’re using Elementor Pro, the built-in sticky option is the easiest and most reliable solution. If you’re using Elementor Free, your theme’s sticky header feature or a lightweight plugin can provide a similar result without much effort.
Whichever method you choose, remember to test your header on different screen sizes, keep the design clean, and avoid unnecessary animations. A well-designed sticky header should support your visitors—not distract them.
Key Takeaways
- Elementor Pro includes a built-in sticky header feature through Motion Effects.
- Elementor Free users can create a sticky header using their theme or a WordPress plugin.
- Always apply the sticky effect to the parent header container, not individual widgets.
- Test your sticky header on desktop, tablet, and mobile devices.
- Keep the header compact and ensure it doesn’t cover your page content.
- Clear your cache after making changes if the sticky effect doesn’t appear immediately.