We’ve all been there. It’s 10:00 PM, you’re just finishing up some routine site maintenance, and you see that red “Update” bubble on a plugin. You think, “I’ll just click this quickly before I log off.”
You click Update. Your screen refreshes.
And suddenly, your entire website—your beautifully designed homepage, your valuable blog posts, your online store—is gone. It’s replaced by a single, terrifying line of plain, white text on a blank screen:
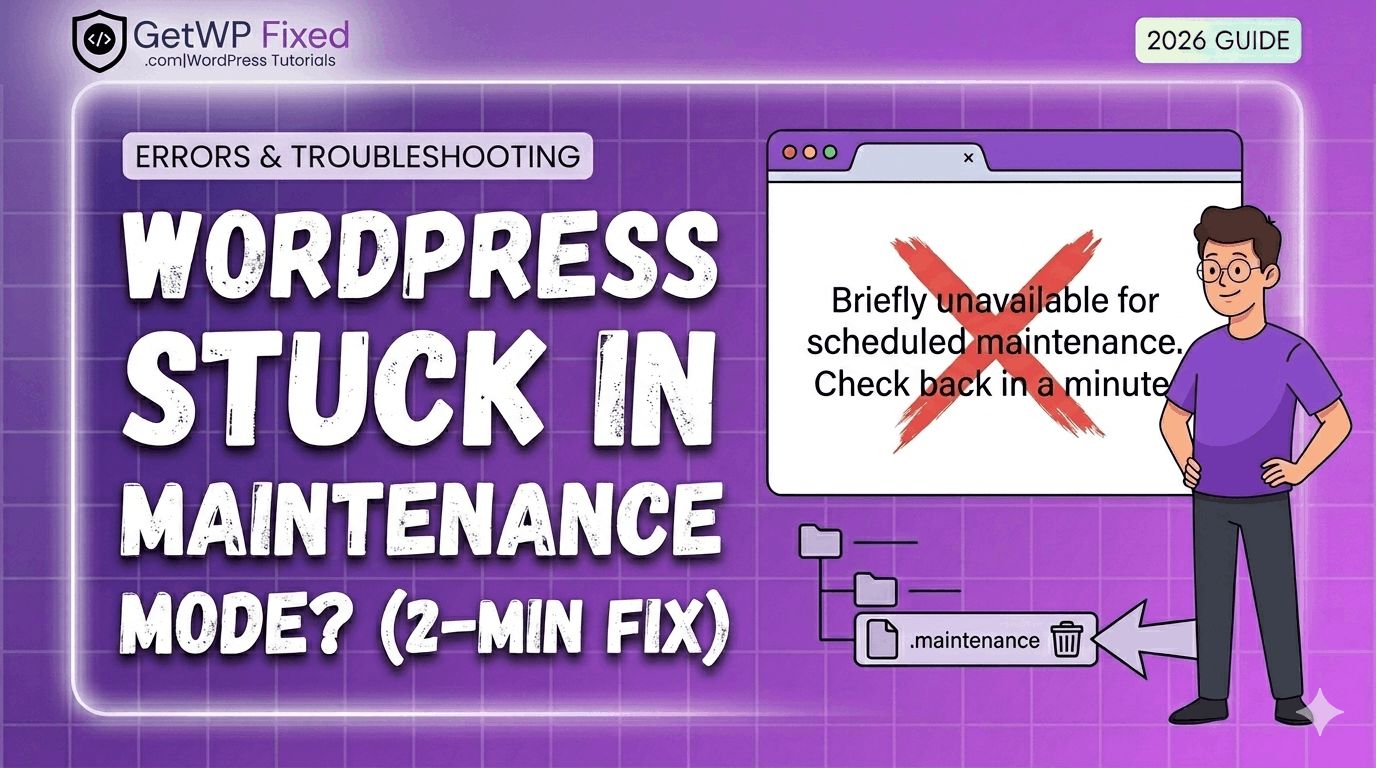
“Briefly unavailable for scheduled maintenance. Check back in a minute.”
Ten minutes go by. You check back. It’s still there. You try your admin dashboard. It’s blocked, too. Panic starts to set in.
At GetWPFixed, I see this issue almost every week. If this is happening to you right now, the first thing I want you to do is take a deep breath. I promise you didn’t break your website. Your data is safe. This isn’t a hack, and it’s not a server crash. It’s just a tiny, stubborn “ghost” file that didn’t delete itself correctly.
This is my definitive 2026 guide to resolving this error. By the end of this post, you will understand exactly why this happens, how to fix it in two minutes (most of the time), and how to prevent it from ever happening again. Let’s get your site back online.
Part 1: Why Does WordPress Get Stuck in Maintenance Mode? (The Science Behind the Error)
To fix the problem permanently, it helps to understand what’s happening behind the scenes. This error is actually a feature, not a bug.
1.1 The Maintenance Mode Process
When you click the update button for a core WordPress file, a theme, or a plugin, WordPress needs a “safe space” to make those changes. It can’t have live users navigating the database while it’s trying to rewrite its core files.
Here is the four-step “Handshake” process that should happen:
- The Trigger: You click “Update.”
- The Lock: WordPress instantly creates a hidden file in your site’s root directory called .maintenance.
- The Show: While this file exists, it acts as a “DO NOT DISTURB” sign. It automatically displays that “Briefly unavailable…” message to every visitor, including you.
- The Release: As soon as the update is successful, WordPress is supposed to delete the .maintenance file, instantly restoring normal site access.
1.2 The Failure: What Went Wrong?
The problem occurs when Step 3 finishes but Step 4 fails. The update completes, but the handshake gets “confused,” and the .maintenance file is never deleted. Your site remains locked, still displaying the “DO NOT DISTURB” sign.
The most common reasons for this failure are:
- You Closed the Tab Too Early: This is the #1 cause. You clicked “Update” and then immediately navigated away from the page or closed your browser window before you saw the green “Update Successful” message.
- Server Timeout: If your hosting server is experiencing a momentary spike in traffic or is simply running slowly, the update process can exceed the PHP Maximum Execution Time. WordPress “gives up” on deleting the file because it took too long. (This is related to our previous post on fixing PHP memory limits!)
- Plugin/Theme Conflict: Occasionally, a rogue plugin or theme can conflict with the WordPress core update process, “blocking” the automatic deletion of the maintenance file.
Now that we know why we are stuck, let’s fix it.
Part 2: The Easiest Fix (Try This First)
Before we start messing with files and code, try the simplest “non-techy” solutions. There is a 90% chance one of these two steps will fix it instantly.
Fix #1: Force Refresh (The Hard Refresh)
Sometimes, your site is actually already fixed, but your browser is still showing you a “cached” version of the error. A standard refresh won’t work. You need to tell your browser: “Forget everything you think you know about this URL, and load a fresh version from the server.”
This is called a “Hard Refresh” or “Clear Cache for this Page.”
- On Windows (Chrome, Firefox, Edge): Press Ctrl + F5. Or hold Ctrl and click the refresh button.
- On Mac (Safari): Hold Option + Command and press R.
- On Mac (Chrome/Firefox): Hold Shift + Command and press R.
Fix #2: Clear Your Browser Cache and Cookies
If the hard refresh didn’t work, your browser might be stubbornly clinging to the memory of that error page in its cookies. Try opening your site in an Incognito or Private window. If it loads there, you are fixed! Just clear your browser cache and cookies, and your standard window will work again.
Part 3: The Technical Fix (Deleting the Stubborn File)
If you have tried the “easy fixes” and your site is still showing the maintenance message, you have to get your hands dirty. We need to manually delete that .maintenance file.
Don’t panic—this is as scary as it sounds. You just need access to your site’s root directory (the core “filing cabinet” of your WordPress install).
What You Will Need
There are two ways to do this. I will show you both.
- Method A: Access to your Host’s CPanel. (The easiest for most beginners).
- Method B: An FTP Client (like FileZilla). This is what developers use, but both methods achieve the same thing.
Method A: Using CPanel’s File Manager (Easiest Method)
If your host uses CPanel (common with hosts like Bluehost, SiteGround, and many others), this is the fastest way to fix the problem.
- Log into your Host: Go to your web hosting provider’s website and log into your control panel or dashboard.
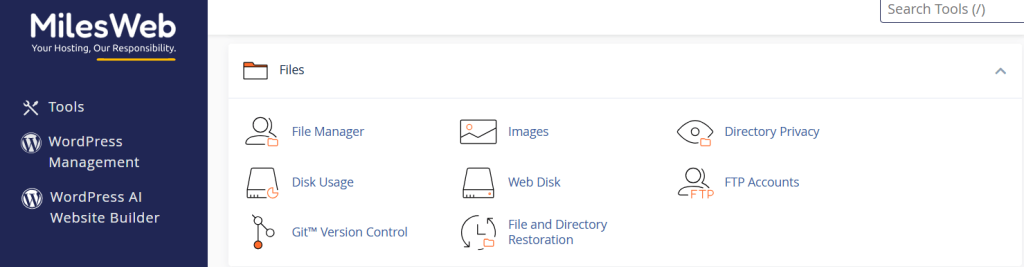
- Locate “File Manager”: Search for an icon that says “File Manager.” It often looks like a filing cabinet or a stack of papers. Click it.
- Go to the Root: A new window will open, showing you all of your site’s folders. You are looking for the “root directory.” This is almost always named public_html. Double-click that folder.
- Confirm the Contents: Once you are inside public_html, you should see several folders, including wp-content, wp-admin, and wp-includes. You should also see files like wp-config.php. You are in the right place!
- Find the File: Look for a file named .maintenance. (The dot at the beginning is important—it means it’s a hidden file).
- Delete It: If you see it, single-click it to highlight it. Then, find the “Delete” icon at the top of your File Manager screen and click it. Confirm the deletion.
- Refresh Your Site: Go back to your website and perform a hard refresh (Ctrl + F5). Your site is fixed!
What If I Don’t See the .maintenanceFile?
This is a common frustration. In some File Managers, “hidden” files are disabled by default. If you are in the public_html folder and don’t see the file, look for a “Settings” or “Preferences” cog icon (usually in the top-right corner). Click it, and check the box that says “Show Hidden Files (dotfiles).” The .maintenance file should now appear.
Method B: Using an FTP Client (The Developer Way)
If you don’t use CPanel or prefer to use an FTP client, you can follow these steps. For this example, I am using FileZilla (which is free and safe).
- Get Your FTP Credentials: You will need three pieces of information from your host: FTP Hostname, FTP Username, and FTP Password. You can find these in your host’s dashboard.
- Open FileZilla: In the fields at the top, enter your Hostname, Username, and Password, and click Quickconnect.
- Locate the Root: FileZilla’s screen will split. On the right side, you will see your “Remote Site” (your web server). You are looking for that public_html folder again. Double-click it.
- Find and Delete: Inside public_html, locate the .maintenance file. Right-click it and select Delete. Confirm.
- Refresh Your Site: Do a hard refresh on your browser. Done!
Part 4: Advanced Troubleshooting (What If Method A and B Failed?)
So, you’ve deleted the .maintenance file, you’ve cleared your cache, and your site is still stuck.
This is a much rarer scenario, but it happens. If deleting the file didn’t work, it means that the problem wasn’t the .maintenance file at all—it means your server is physically stuck in the middle of a conflict and doesn’t know how to stop.
Here is what you need to do next, in order of likelihood:
4.1 Check Your PHP Memory Limit
A very common reason an update fails in 2026 is that the update itself required more temporary “brainpower” (memory) than your host allows. If your site hit its limit, the update process stopped, but the maintenance signal got stuck.
You can increase this limit easily by adding a line to your wp-config.php file (the same place you found that .maintenance file!).
Open wp-config.php and paste this line just before the text that says “That’s all, stop editing! Happy publishing.”:
define(‘WP_MEMORY_LIMIT’, ‘512M’);
4.2 Manually Deactivate Your Plugins
If increasing the memory didn’t work, we must assume that one of your plugins (the one you just tried to update, or another one) is in an active conflict. Since you can’t access your admin dashboard to disable them, we have to do it manually.
- Go Back to File Manager/FTP: Go back to your public_html folder.
- Find the Plugins Folder: Double-click the wp-content folder. Inside, you will see a folder named plugins.
- “Break” the Folder: This is a developer trick! Right-click the plugins folder and rename it to something like plugins_OLD.
- Why this works: When WordPress tries to load your site, it looks for the plugins folder. If it can’t find it, it automatically deactivates all your plugins safely.
- Refresh Your Site: Perform a hard refresh. If your site loads, you know one of your plugins was the “villain.”
- Find the Offender: Rename the folder back to plugins. (Your plugins are still deactivated). Log into your dashboard and activate them one by one until you find the one that breaks the site again.
Part 5: How to Prevent This from Ever Happening Again (My 2026 Pro Tips)
While this fix only takes two minutes, it’s a distraction you don’t need. Here is my “Best Practice” advice for updating your site safely.
5.1 The “Golden Rules” of WordPress Updates
Follow these three simple rules, and you will dramatically reduce your risk:
- Never Close the Tab: When you click update, wait. Wait until you see the final, green confirmation message that says “Update Successful.” Do not minimize the window, do not navigate away, do not change tabs. Give it your full attention for those 15 seconds.
- Update One Thing at a Time: If you see 10 plugins that need updates, do not click the “Bulk Update” button. The bulk update process is significantly more prone to server timeouts. Click Update on one, wait for the green checkmark, then move to the next.
- Backup Before You Click: Before you do any maintenance, perform a backup. Modern tools make this easy, and it gives you a “Rewind” button if the worst-case scenario happens.
5.2 Consider Automatic Updates (with caution)
In 2026, automatic updates have become very stable. For core WordPress files, you should keep them enabled. For plugins, I recommend enabling auto-updates for essential, well-maintained plugins (like Yoast SEO or WooCommerce). This prevents you from needing to manually click update, which is often when the errors happen.
Part 6: Case Study: “I Just Wanted to Update my Theme!”
A client recently came to me with their site stuck. When I asked what happened, they said, “I tried to update my Astra theme, and it just got stuck.”
I quickly deleted the .maintenance file, which got their dashboard back online. However, I noticed that the Astra theme update hadn’t actually completed. When I tried to update it again, it timed out a second time.
The Fix: This wasn’t a standard maintenance mode issue; it was a severe theme conflict. We had to:
- Switch to a Default Theme: We temporarily activated the default Twenty Twenty-Five theme.
- Delete the Old Theme: We deleted the old version of Astra.
- Install the New Theme Fresh: We installed the newest version from the WordPress repository. This clean installation bypassed the “stuck” update process entirely.
Sometimes, the maintenance message is just the symptom; the real problem requires a deeper look!
Conclusion: You are Not Broken, You are in Maintenance.
The “stuck in maintenance mode” error is one of the most frightening-looking errors in WordPress, but it is one of the least harmful. It’s like being locked out of your car because the automatic lock didn’t release correctly—the car itself is fine; you just need to pop the lock manually.
Keep this guide bookmarked for the next time it happens. And remember, security issues are often what cause server timeouts during updates. If you haven’t seen our [2-minute guide to hiding your login page], check that out next to help keep your server running at peak performance.**Still seeing that “Briefly unavailable” message? Drop a comment below, tell me what you’ve tried, and I’ll help you get GetWPFixed!